
Are you fascinated by the sleek design of a kayak gliding gracefully across the water? Imagine capturing that beauty on paper with your own hands.
Whether you’re an aspiring artist or just someone who loves a creative challenge, learning how to draw a kayak can be a rewarding experience. This guide will walk you through the simple steps to bring this dynamic watercraft to life on your canvas.
You’ll discover tips and tricks that make drawing not only easier but also more enjoyable. By the end of this article, you’ll have the skills to create a kayak drawing that you can be proud of. Ready to unleash your inner artist and dive into the world of drawing? Let’s get started!
Materials Needed
Gather pencils, paper, and erasers for sketching. Include colored pencils or markers for adding vibrant hues. Use a ruler for straight lines.
Drawing a kayak can be an exciting project, whether you’re a seasoned artist or just beginning your journey into the world of sketching. Before diving into the actual drawing process, gathering the right materials is essential. The right tools not only make the task easier but also enhance the overall quality of your artwork. Let’s delve into the essentials you’ll need to create a stunning kayak drawing.Basic Drawing Supplies
To start, you’ll need some fundamental drawing supplies. These include a set of pencils with varying degrees of hardness, ranging from HB to 6B. This variety allows you to achieve different shades and textures. Don’t forget a good-quality eraser for those inevitable mistakes and adjustments. A sketchbook or drawing paper with a decent thickness is also crucial. This ensures that your drawing doesn’t get smudged easily and can handle multiple layers of pencil strokes.Optional Coloring Tools
If you wish to add color to your kayak drawing, consider using colored pencils or markers. These tools can bring your sketch to life, giving it a vibrant and realistic appearance. Choose colors that match real kayak designs, or let your creativity run wild with your own palette. Watercolors can also be an excellent choice for adding a softer, more fluid look to your drawing. Just ensure your paper is suitable for watercolor use to avoid any warping or bleeding.Reference Materials
Having a clear reference can make a significant difference in your drawing. Consider using photographs of kayaks from different angles to guide your sketch. You might also find it helpful to study kayak design books or online tutorials for more detailed insights. Are there specific kayak features you want to emphasize in your drawing? Having a reference will help you capture those details accurately.Workspace Setup
Finally, don’t underestimate the power of a well-organized workspace. Ensure your drawing area is clean, well-lit, and free from distractions. A comfortable chair and desk can make longer drawing sessions more enjoyable. Having all your materials within arm’s reach will keep your creative flow uninterrupted. Are you ready to bring your kayak drawing to life? With these materials in hand, you’re well on your way to creating something truly special.
Credit: www.freepik.com
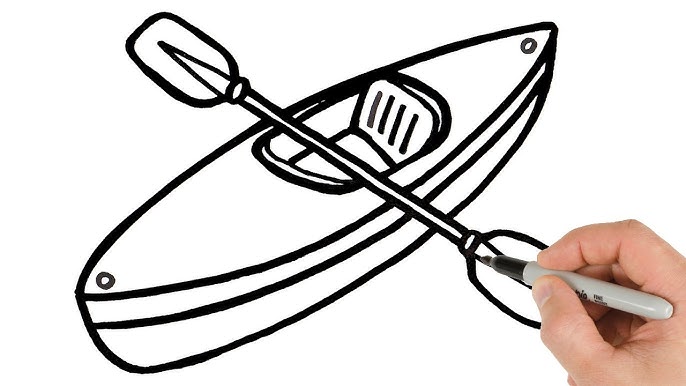
Basic Shapes
Drawing a kayak can seem complex, but breaking it down into basic shapes makes it simple. By focusing on the hull and cockpit, you can create an accurate representation. Let’s explore how to outline these essential components.
Hull Outline
Begin with the hull, the kayak’s main body. Start by sketching a long, oval shape. This represents the bottom view of the kayak. Ensure the oval is slightly pointed at both ends, resembling a streamlined boat.
Next, draw a line through the center of the oval. This line divides the hull into two symmetrical halves. It helps maintain balance and accuracy in your drawing. Adjust the shape to refine the curves and pointy ends.
Cockpit Placement
The cockpit is where the paddler sits. It’s positioned slightly towards the back of the kayak. Draw a small oval inside the hull outline. This oval should be centered horizontally and located closer to the rear.
Ensure the cockpit oval is smaller than the hull. This maintains proportion and gives your drawing a realistic look. Adjust its size and position for symmetry and style.
Adding Details
Sketch fine lines to show the kayak’s curves and edges. Add details like paddles and seat outlines. Highlight the kayak’s design with light shading for depth.
Adding details to your kayak drawing brings it to life. It enhances the realism and appeal. Focus on each element. Ensure precision and creativity.Paddle Design
Drawing paddles involves creativity. Start with the shaft. It’s a simple straight line. Next, sketch the blades. They are oval-shaped at each end. Keep them symmetrical. Add texture lines on the blades. These indicate grip and material. Detail the joints where blades meet the shaft. This adds realism. Use light shading for depth. It creates a three-dimensional effect.Seat Features
The seat is crucial for a kayak’s look. Begin with the seat’s outline. It’s usually rectangular or oval. Add cushioning details. Draw soft curves and lines. These suggest padding. Include backrest lines. This part supports the kayaker. Highlight straps or buckles. These keep the seat secure. Use shading to show texture. It makes the seat appear comfortable. Add small accessories like cup holders. This makes the kayak more realistic.
Credit: www.dreamstime.com
Shading Techniques
Explore shading techniques to add depth and texture when drawing a kayak. Use cross-hatching and stippling for realistic effects. Lightly shade areas to highlight curves and contours, enhancing the kayak’s three-dimensional appearance.
Shading techniques can transform your kayak drawing from a simple outline into a lifelike masterpiece. Mastering these techniques allows you to add depth and dimension, making your kayak appear three-dimensional. Below are some crucial aspects of shading that can help elevate your drawing skills.Light Source Considerations
Understanding the light source is essential in shading. Ask yourself: where is the light coming from? This will determine where the shadows and highlights fall on your kayak. Consider drawing a small sun or light bulb icon on your sketch to remind you of the light direction. This helps you consistently apply shadows and highlights throughout your drawing. Remember, the areas facing the light source will be lighter, while those away will be darker.Texture Effects
Adding texture can bring realism to your kayak drawing. Think about the surface of the kayak—smooth, rugged, or a combination of both. Use different pencil strokes to mimic these textures. For a smooth surface, use soft, even strokes. If the kayak has a rough texture, try cross-hatching or stippling to create that effect. Experiment with different shading tools, like blending stumps or tissue paper, to achieve the desired texture. What textures do you observe in real life that you can replicate in your drawing?Color Choices
Selecting the right colors for drawing a kayak enhances its visual appeal. Use natural hues like blue or green to reflect water environments. Add vibrant accents to highlight unique features and create contrast.
Choosing colors for your kayak drawing can be fun and creative. Colors can set the mood and bring your drawing to life. Whether you aim for realism or want to explore creative options, colors play a key role.Realistic Tones
For a realistic kayak, consider natural tones. Red, yellow, and blue are common in kayaks. These colors stand out on water, ensuring safety. Use earthy colors like green and brown for a more natural look. Consider the environment where the kayak would be. Bright colors work well for sunny, open waters. For rivers or lakes, muted tones might be more fitting. Adding shadows and highlights gives a three-dimensional feel.Creative Variations
Feel free to experiment with bold and bright colors. Neon shades can make your kayak pop. Patterns add a unique touch. Stripes, waves, or abstract designs can be eye-catching. Try blending colors for a gradient effect. This gives depth and interest. Use complementary colors to create contrast. This makes the kayak stand out. Don’t hesitate to use unconventional colors. Purple or pink can make your kayak truly unique.Final Touches
You’ve sketched the basic outline of your kayak and added some detail. Now, it’s time to bring your drawing to life with the final touches that make it pop. This is where your artistic flair shines through, adding depth and personality to your artwork. Don’t rush this part; it’s the small details that can transform your sketch into a masterpiece.
Highlighting
Enhancing your kayak drawing with highlights can make it appear more dynamic and three-dimensional. Consider where the light source is coming from in your scene and add lighter tones or white pencil strokes to those areas. This could be the top edge of the kayak or areas that might catch the sunlight. Don’t overdo it; subtlety is key. The aim is to mimic how light naturally interacts with surfaces. You might find that adding highlights to the paddle blades gives them a realistic touch, as if they are glinting in the sun.
Background Elements
A kayak doesn’t exist in isolation; the background can enhance the overall mood of your drawing. Think about the environment your kayak is in—are you depicting a serene lake, a rushing river, or a bustling harbor? Adding elements like water ripples, distant trees, or even a shoreline can create context and depth. You might choose to draw simple waves to suggest motion or tranquility. Personalize it: perhaps it reminds you of a memorable kayaking trip. This background not only frames your kayak but also tells a story. What narrative do you want your drawing to convey?

Credit: www.dreamstime.com
Frequently Asked Questions
How To Kayak Simple?
Start kayaking by sitting comfortably in the kayak. Hold the paddle with both hands, keeping it horizontal. Use simple, alternating strokes to move forward. Keep your eyes on the water and maintain balance. Practice turning by paddling on one side.
Always wear a life jacket for safety.
How To Draw A Pelican For Beginners?
Start with a large oval for the body and a smaller circle for the head. Add a long, curved beak and draw a line for the neck. Sketch wings and tail with simple curved lines. Add legs and feet. Erase unnecessary lines, refine details, and color your pelican.
How To Draw A River Easily For Beginners?
Begin with a wavy line for the river’s path. Add parallel lines for riverbanks. Sketch surrounding trees and rocks. Use varying shades of blue for water depth. Highlight reflections with white strokes. Finish with green for grass and foliage. Practice regularly for improvement.
How To Personalize A Kayak?
Customize your kayak with vibrant decals, paint, or stickers. Add a comfortable seat for longer paddling trips. Install fishing rod holders and storage bags for added functionality. Securely attach a personalized paddle with grip tape for better handling. Ensure all modifications enhance your kayaking experience and safety.
Conclusion
Drawing a kayak can be fun and rewarding. With practice, your skills will improve. Use simple shapes to start. Add details slowly. Focus on the kayak’s unique features. Observe real kayaks for inspiration. Don’t rush the process. Enjoy each step of your artistic journey.
Remember, every artist was once a beginner. Keep your pencil moving. Experiment with different styles. Your personal touch makes it special. Share your artwork with friends. Inspire others to draw too. Keep practicing, and soon, you’ll create beautiful kayak drawings.
Happy drawing!


