

Imagine gliding across a serene lake on your kayak, feeling the sun on your face and the water beneath you. It’s a perfect day.
But then you remember the struggle of getting your kayak from your car to the water. It’s cumbersome, awkward, and let’s be honest, it takes away some of the joy of kayaking. What if there was a simple, cost-effective solution that you could create all by yourself?
Meet the DIY Kayak Cart—a game-changer for every kayaking enthusiast. This guide will show you how to build your very own kayak cart, saving you money and making your trips to the water effortless. You’ll discover the materials you need, the steps to follow, and some handy tips to make sure your cart is just right for you. So, why not take control of your kayaking experience? Read on to transform the way you transport your kayak and make every outing as smooth and enjoyable as possible.
Materials And Tools Needed
Materials and Tools Needed Constructing a DIY kayak cart requires PVC pipes, wheels, and a sturdy axle. Additional essentials include a saw, measuring tape, and a drill. Ensuring all components are durable helps support the weight of the kayak effectively.
Creating your own kayak cart is a rewarding project that combines creativity with practicality. Before diving into the assembly, it’s crucial to gather all necessary materials and tools. With the right supplies, you’ll find the process smoother and more enjoyable. You might even discover that some materials are already available in your garage or workshop, reducing the need for additional purchases. Let’s explore what you’ll need to get started.Materials Required
- PVC Pipes:Opt for sturdy PVC pipes that can withstand weight and provide stability.
- Wheel Set:Choose wheels with a solid structure. Pneumatic tires can be a great choice for easy maneuverability.
- Axle Rod:A robust metal axle will serve as the backbone of your cart, connecting the wheels securely.
- End Caps:Ensure your PVC pipes are capped off to prevent debris from entering.
- Foam Padding:This will protect your kayak from scratches and provide a snug fit.
- Nuts and Bolts:These will be essential for securing various parts of your cart.
Tools Needed
- Drill:A power drill will be necessary for making precise holes in the PVC.
- Measuring Tape:Accurate measurements ensure a perfect fit for your kayak.
- Pipe Cutter:A PVC pipe cutter is ideal for clean, straight cuts.
- Wrench Set:Use these to tighten nuts and bolts securely.
- Screwdriver:Handy for assembling smaller components of the cart.
Choosing The Right Design
Selecting the ideal design for your DIY kayak cart involves considering weight, terrain, and materials. Focus on durability and ease of assembly to ensure smooth transportation.
Choosing the Right Design for your DIY kayak cart can make all the difference in your kayaking experience. A well-thought-out design ensures your cart is both functional and durable, saving you from the frustration of struggling with your gear before you even hit the water. Let’s dive into some crucial factors you should consider when selecting the perfect design for your kayak cart.Considerations For Terrain
The terrain you frequently encounter will greatly influence your design choice. If you often find yourself trekking across sandy beaches, larger wheels can prevent the cart from sinking into the sand. On rocky or uneven surfaces, more robust and durable materials can withstand the bumps and scrapes. Think about the paths you take. Are they paved or laden with obstacles? Tailoring your cart to handle these conditions will make your outings more enjoyable and less of a hassle.Weight And Portability
The weight of your kayak and the cart’s portability should go hand in hand. A lightweight design is crucial if you plan to carry your cart by hand or store it in a compact space. Consider using materials like aluminum or PVC to keep the cart light yet sturdy. Ask yourself, how often will you need to transport your cart over long distances? If portability is a priority, foldable designs or detachable parts can make transportation much easier. Balancing weight with durability is key to a successful DIY project.Step-by-step Construction
Building your own kayak cart is a rewarding project. With some basic tools and materials, you can create a handy cart for your kayak. This guide will walk you through the construction process, ensuring your cart is sturdy and reliable.
Assembling The Frame
Start by gathering the necessary materials. You’ll need PVC pipes, connectors, and a saw. Measure the pipes to fit the width of your kayak. Cut the pipes to your required lengths using the saw. Connect them using PVC connectors. Ensure all joints are tightly fitted. This forms the sturdy base of your cart.
Attaching The Wheels
Choose wheels that can handle rough terrain. Fix them to the frame using axle rods. Drill holes in the PVC pipes for the rods. Slide the rods through the holes and secure them with nuts. Ensure the wheels spin freely for smooth movement.
Securing The Kayak
Use straps to keep your kayak in place. Attach the straps to the frame with hooks. Test the security by placing the kayak on the cart. Adjust the straps for a snug fit. This prevents the kayak from slipping during transport.

Credit: www.instagram.com
Tips For Customization
Customizing your DIY kayak cart can make a world of difference in enhancing your kayaking experience. Whether you’re dealing with varying kayak sizes or looking to add more comfort, customization allows you to tailor the cart to meet your specific needs. Let’s dive into some practical tips that can help you make the most out of your kayak cart customization.
Adjusting For Different Kayak Sizes
Kayaks come in various shapes and sizes, and your cart should be adaptable enough to accommodate them all. Consider using adjustable straps or brackets that can be modified to fit the width and length of different kayaks. This flexibility ensures that you won’t need a separate cart for each kayak you own.
Using extendable arms can be a practical solution. It allows you to easily modify the cart’s width, giving you the perfect fit without complicated adjustments. This way, even if you upgrade to a larger kayak, your cart will still be useful.
Think about the height of the cart as well. Having a height-adjustable cart can prevent your kayak from scraping the ground, especially on uneven terrain. This simple adjustment can save your kayak from unnecessary wear and tear.
Adding Comfort Features
Comfort is key when transporting your kayak. Adding foam padding to the cart’s arms can protect your kayak from scratches and dents. It also reduces friction during transit, making the journey smoother and more comfortable for your kayak.
Consider installing ergonomic handles on your cart. These can make the process of pulling or pushing your kayak much easier and less straining on your hands. You might even find yourself enjoying the walk from your car to the water.
What about the wheels? Think about adding larger, puncture-proof wheels for a smoother ride over various terrains. This upgrade not only boosts comfort but also enhances the functionality of your cart, enabling you to glide over sand, gravel, or grass effortlessly.
How can you make your kayak cart uniquely yours? Have you tried any of these customization tips yet? Share your experiences and insights with fellow kayaking enthusiasts!
Testing And Adjustments
Testing and adjustments are crucial steps in building your DIY kayak cart. These steps ensure your cart performs well on different terrains. You want your kayak to glide smoothly without any wobble. This process helps you identify areas needing tweaks. Let’s dive into how you can ensure a stable and reliable kayak cart.
Ensuring Stability
Stability is key for a reliable kayak cart. Start by checking if your kayak sits securely. Push your cart gently and observe any movements. The kayak should not tip over or slide. If it wobbles, the cart might need tightening.
Inspect the wheels. They should rotate freely without obstruction. If they stick, clean or lubricate them for smooth movement. Ensure the axles are straight. Bent axles can cause instability. Reinforce any weak points using extra support materials.
Making Necessary Modifications
Adjustments may be needed for a perfect fit. If the frame is loose, tighten the bolts. Use additional washers if needed. If your cart is too high, shorten the frame. This helps in easy handling.
Test on various surfaces. Grass, sand, and pavements can affect performance differently. Adjust tire pressure for better traction. Consider using wider tires for sandy terrains. Swap materials if they wear out quickly.
Document each change. This helps track what works best for your kayak cart. Keep tools handy for quick modifications. Regular testing ensures your kayak cart remains in top condition.
Maintenance And Care
Maintaining your DIY kayak cart ensures it lasts longer and performs better. Regular care keeps it ready for your next adventure. Let’s explore some essential tips for cleaning, storage, and inspections.
Cleaning And Storage
After each use, remove dirt and sand from your kayak cart. Use a hose or damp cloth to clean the wheels and frame. Dry your cart thoroughly to prevent rust and corrosion.
Store your kayak cart in a dry, cool place. Avoid direct sunlight which can damage the materials over time. A dedicated spot in your garage or shed works well.
Regular Inspections
Check your cart for any loose bolts or parts. Tighten them to ensure stability. Inspect the wheels for wear and tear. Replace them if they show signs of damage.
Look for any signs of rust or corrosion. Treat affected areas with anti-rust spray. Regular inspections help you avoid surprises on your trips.
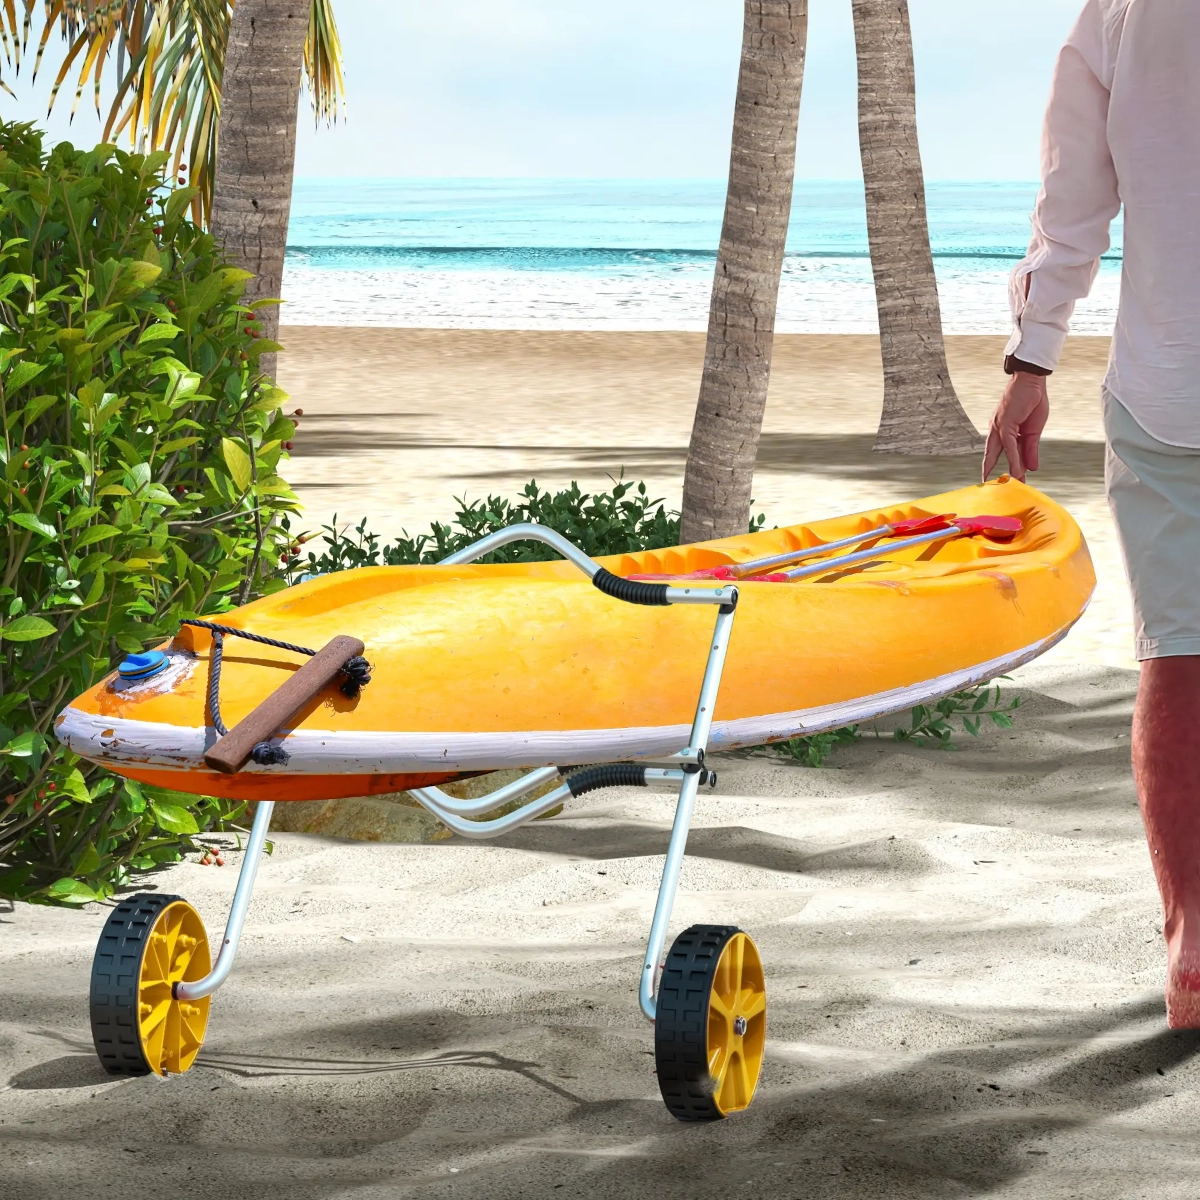
Exploring With Your Diy Kayak Cart
Creating your own kayak cart is a fun project. It helps transport your kayak easily to the water. Gather some simple tools and materials, and you’ll have a custom solution that fits your needs perfectly. Save money and enjoy a handy tool for your kayaking adventures.
Exploring with Your DIY Kayak Cart Imagine gliding over tranquil waters, your kayak cutting through reflections of the sky. With a DIY kayak cart, you can easily transport your kayak from the parking lot to the shore. Building your own cart adds a sense of adventure before you even hit the water. A DIY kayak cart is not just a tool; it’s an enabler of countless adventures. It’s lightweight, easy to assemble, and customizable to fit your kayak perfectly. Plus, making one yourself can be an exciting project that saves money and provides a sense of accomplishment.Ideal Locations For Use
Choosing the right spot to launch your kayak is crucial. Look for locations with gentle slopes, as they make using your cart much easier. Parks with dedicated kayak launch areas are ideal because they often have well-maintained paths. Many lakes and rivers have hidden gems waiting to be discovered. Try exploring less crowded spots where nature thrives undisturbed. Your DIY kayak cart allows you to easily reach these serene, out-of-the-way locations. When planning a trip, consider the terrain you’ll navigate with your cart. Sandy beaches, grassy fields, or paved paths? Each offers a unique challenge, but with a sturdy cart, you’re ready for all.Safety Tips On The Water
Safety should always be your top priority while kayaking. Make sure your kayak is securely fastened to the cart before heading to the water. Double-check all connections to prevent mishaps. Always wear a life jacket, even if you’re a confident swimmer. Conditions can change quickly, and it’s better to be prepared. Inform someone of your plans, including where you’re going and when you expect to return. Be mindful of weather conditions. Strong winds and high waves can turn a peaceful outing into a dangerous situation. Check the forecast and be willing to change plans if conditions aren’t favorable. Lastly, trust your instincts. If something doesn’t feel right, it’s okay to turn back. Your safety is more important than reaching a destination.
Credit: www.instagram.com
Credit: www.aosom.ca
Frequently Asked Questions
Are Kayak Carts Worth It?
Kayak carts are worth it for easy transportation. They save effort and prevent strain or injury. Ideal for solo kayakers or those with heavy gear. Investing in a kayak cart enhances convenience and protects your equipment from damage. Choose one based on your kayak’s size and terrain needs.
Do It Yourself Kayak Rack For Car?
Create a DIY kayak rack using foam blocks or pool noodles and ratchet straps. Secure the kayak with straps across the roof. Position foam blocks to protect the car’s surface. Ensure stability by tightening straps properly. This affordable solution is easy to assemble and provides safe transportation for your kayak.
How To Transport A Kayak By Yourself?
Use a kayak cart to transport your kayak easily. Secure it with straps and roll it to your destination. Lift one end onto your car roof, then slide the kayak up. Secure it tightly with cam straps or ratchet straps.
Ensure all straps are secure before driving.
Where Do You Put A Kayak Cart When Kayaking?
Secure the kayak cart in the kayak’s rear hatch or under bungee cords. Ensure it’s tightly fastened. Choose a spot that balances weight and avoids obstruction. This keeps the kayak stable and prevents loss or damage during paddling, ensuring a smooth and enjoyable experience on the water.
Conclusion
Building your own kayak cart is rewarding and practical. You save money and learn new skills. A homemade cart fits your needs perfectly. No more struggling to carry your kayak alone. You gain independence and confidence on the water. Sharing your DIY success inspires others too.
Enjoy your kayaking adventures more with your custom cart. Embrace the simplicity and effectiveness. It’s a small project with big benefits. Start today, and glide effortlessly to your next paddle adventure. Happy kayaking!


