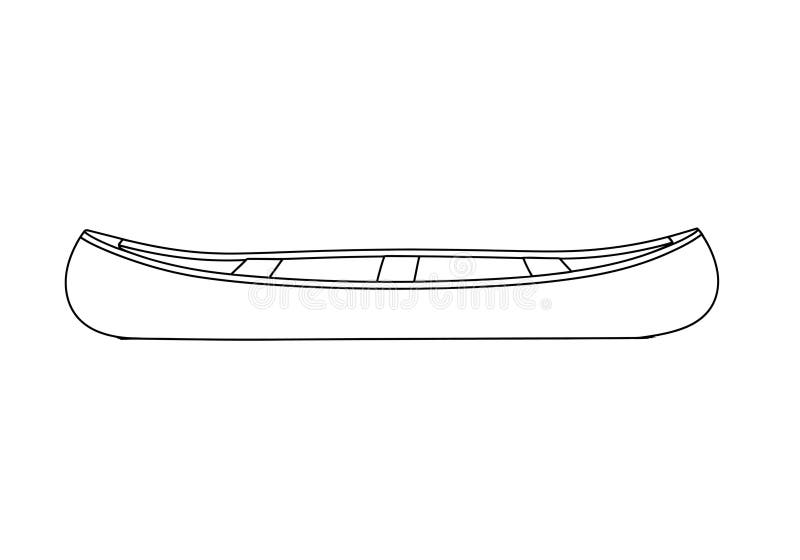
Imagine sitting by a calm lake, the gentle breeze brushing past your face as a canoe glides effortlessly across the water. It’s a tranquil scene that inspires creativity and serenity.
If you’ve ever wanted to capture this peaceful moment on paper, you’re in the right place. Drawing a canoe might seem challenging at first, but with a few simple steps, you can create a stunning piece that evokes the beauty of nature.
In this guide, you’ll discover how to draw a canoe using straightforward techniques that anyone can master. Whether you’re a seasoned artist or a beginner, this tutorial will help you bring your vision to life. By the end, you’ll not only have a beautiful drawing but also a new skill that you can apply to other artistic endeavors. Let’s dive in and transform your blank canvas into a masterpiece.

Credit: www.dreamstime.com
Materials Needed
Gather essential materials to draw a canoe, including paper, pencils, erasers, and colored pencils. A ruler helps with precision, while a reference image aids in capturing details accurately.
When embarking on the artistic journey of drawing a canoe, having the right materials at your fingertips can make the process not only smoother but immensely enjoyable. The joy of sketching lies in the simplicity of the tools you choose and how they complement your creative flair. Imagine sitting by a serene lake, inspired by the reflections on the water, with your sketchpad open and ready to capture the essence of a canoe. Before you dive into drawing, let’s ensure you have all the essentials at hand.
Drawing Paper
Choose a sketchpad or loose sheets of drawing paper that offer a smooth texture. The type of paper can influence the quality of your lines and shading. Whether you prefer heavyweight paper for durability or a lighter option for easy erasing, make sure it suits your style.
Pencils
A set of pencils with varying hardness is crucial. Use softer pencils for shading and darker lines, while harder pencils are perfect for finer details. Having a range from 2H to 6B will give you the flexibility needed to capture every element of the canoe.
Eraser
A good quality eraser is your best friend in correcting mistakes. Opt for a kneaded eraser for precise adjustments or a vinyl eraser for clean, bold erasures. It’s all about making your sketch as neat as possible.
Ruler
A ruler is indispensable for drawing straight lines and achieving symmetry. Whether you’re sketching the sleek lines of the canoe or the symmetry in the paddle, a ruler ensures your drawing maintains its proportions.
Reference Image
Having a reference image of a canoe can be incredibly helpful. It guides your perspective and helps you capture intricate details accurately. This image can be from a photograph or a real-life view, serving as your muse throughout the drawing process. With these materials, you’re set to bring your creative vision to life. Are you ready to see how your canoe drawing evolves with each stroke? Dive into your creative process with confidence, knowing you’re well-equipped to capture the beauty of a canoe on paper.
Setting Up Your Workspace
Organize your workspace with essential drawing tools and materials. Ensure good lighting and a comfortable chair. Keep your reference images and sketches handy for a smooth canoe drawing process.
Creating an inviting workspace is crucial when you’re about to embark on the creative journey of drawing a canoe. An organized and inspiring setup not only enhances your focus but also fuels your creativity. With a well-prepared space, you can fully immerse yourself in the art of drawing without distractions. Ready to set up your perfect drawing environment? Let’s dive in!
Choose A Well-lit Area
Find a spot with plenty of natural light. A bright workspace helps you see details clearly, reducing strain on your eyes. If natural light is limited, consider using a daylight lamp to mimic sunlight.
Organize Your Materials
Keep your drawing supplies within arm’s reach. Arrange your pencils, erasers, and sketchpad neatly to avoid interruptions. A clutter-free desk encourages a focused mind.
Ensure A Comfortable Seating Arrangement
Invest in a comfortable chair that supports good posture. Drawing for extended periods can be tiring, so prioritize your comfort. A cushioned chair or a supportive stool can make a big difference.
Minimize Distractions
Silence your phone and other electronic devices. Inform household members of your drawing time to minimize interruptions. A quiet environment helps maintain concentration and flow.
Add Personal Touches
Decorate your workspace with inspiring art or nature photos. Personal touches can spark creativity and make the space feel inviting. A small plant or motivational quote can add a refreshing vibe.
Keep Hydrated And Energized
Have a water bottle or a cup of tea nearby. Staying hydrated keeps your energy levels up, enhancing your focus. Consider healthy snacks like nuts or fruits to keep hunger at bay. By thoughtfully setting up your workspace, you create an environment conducive to creativity and productivity. Are you ready to see how this newfound focus can transform your drawing experience?
Basic Canoe Shape
Capturing the basic canoe shape is the first step in creating a realistic canoe drawing. This shape acts as the foundation on which you can build more detailed features, like seats and paddles. Think of it as setting the stage for your artistic journey.
Drawing The Hull
The hull is the bottom part of the canoe, and getting it right is crucial for realism. Start by drawing a long, narrow oval shape, which will represent the main body of the hull. This oval should be slightly pointed at both ends, mimicking the streamlined design of a real canoe.
Once you have your oval, add a line from the front to the back to divide it in half. This line will serve as a guide for additional details and help you maintain symmetry. Don’t worry about making it perfect; the beauty of drawing lies in the imperfections.
Sketching The Body
With the hull outlined, it’s time to sketch the body of the canoe. Begin by drawing an arc above the hull, following its curve. This arc represents the top edge of the canoe, known as the gunwale.
Next, connect the ends of the arc to the corresponding ends of the hull. You should now see the basic canoe shape taking form, resembling a long, elegant vessel ready to navigate through water.
Consider this: What unique elements can you add to make your canoe stand out? Perhaps a small flag or a personalized pattern. These touches can transform your drawing into something truly unique.

Credit: pngtree.com
Adding Details
After sketching the basic shape of your canoe, details add realism. These elements breathe life into your drawing. They showcase the canoe’s character and utility. Let’s dive into these intricate details.
Crafting The Seats
Seats are crucial in a canoe’s design. Start by drawing horizontal lines across the canoe’s interior. Ensure they are parallel to the canoe’s sides. Add depth by drawing vertical lines beneath each seat. These lines represent the seat’s support. You can add shading to give a three-dimensional effect. Remember, seats usually sit slightly above the canoe’s base.
Designing The Paddles
Paddles are essential for any canoe drawing. They usually consist of a long shaft and a broad blade. Begin by sketching a long, narrow rectangle for the shaft. At the end, draw a wide, oval shape for the blade. Ensure the blade is symmetrical. Add details like grip lines on the shaft. Place paddles inside the canoe or alongside it in the water.
Incorporating The Ribs
The ribs add structure and strength to the canoe. Draw them as curved lines across the canoe’s bottom. They should be evenly spaced and parallel. Each rib curves gently, following the canoe’s shape. Add subtle shading to highlight the ribs’ texture. These lines give the canoe a realistic and detailed appearance.
Refining The Drawing
Refining the drawing of a canoe involves perfecting lines and curves for a realistic look. Focus on details like the shape of the hull and symmetry to enhance depth.
Refining the drawing of a canoe is where your artistic vision really begins to shine. This stage is all about adding details that make your sketch more realistic and eye-catching. Think of it as polishing a gem—you’ve got the basic shape, and now it’s time to make it sparkle. If you’ve ever wondered how artists bring their sketches to life, this is where the magic happens.
Enhancing The Outline
Start by reviewing the basic shape of your canoe. Are the lines smooth and consistent? Sharpen any wobbly edges with your pencil to make the canoe look sleek and balanced. Pay attention to proportions. The canoe should not look too bulky or too slim. Adjusting the outline can make a big difference in the final appearance. Consider the perspective. Is your canoe drawn from the side, top, or an angle? Each perspective needs different outline adjustments to look realistic.
Adding Texture
Textures can bring depth and interest to your drawing. Use light, short strokes to mimic the grain of the wood on the canoe. Think about the water. Adding gentle ripples or reflections can make the canoe appear as if it’s floating on a serene lake. Experiment with shading. Shadows can suggest sunlight hitting the canoe, emphasizing its curves and adding a three-dimensional feel. As you refine your drawing, keep asking yourself: does this look realistic? Each tweak brings you closer to a more lifelike canoe. Remember, small details can have a big impact, so take your time and enjoy the process.

Credit: www.youtube.com
Shading Techniques
Shading techniques bring depth to a canoe drawing. Use light and dark tones to show curves and reflections. Experiment with cross-hatching or smudging for a realistic look.
Shading techniques give drawings life and dimension. When you draw a canoe, understanding shading can transform your artwork. It brings depth and realism, making the canoe appear three-dimensional. Shading involves observing how light interacts with surfaces. This interaction creates highlights, mid-tones, and shadows, essential for realistic art.
Light Source Considerations
Consider where the light hits the canoe. Identify the direction and intensity of the light source. This helps in placing highlights accurately. Highlights are bright spots where light directly hits. Choose a consistent light direction for your drawing. It affects how shadows and highlights appear. Use softer shading for areas with diffused light. Harder edges indicate direct light exposure. Light placement dictates the overall mood of the drawing.
Creating Depth With Shadows
Shadows add depth to your canoe drawing. They define the shape and position of objects. Observe where shadows naturally fall on the canoe. Use darker tones to create shadowed areas. This technique emphasizes the canoe’s curves and edges. Shadows help separate the canoe from the background. Use gradual shading to enhance depth perception. Avoid harsh lines to maintain a realistic look. Experiment with shadow intensity for varied effects.
Final Touches
Add shading to give depth and dimension. Use fine lines for detail and texture. Check proportions for accuracy.
The final touches bring your canoe drawing to life. These steps refine your artwork, ensuring it looks complete and polished. This stage requires patience and attention to detail. You will enhance the drawing’s overall appearance.
Erasing Guidelines
Start by removing all unnecessary guidelines. Use a soft eraser to avoid smudging. This will clean up your drawing. Focus on lines that disrupt the final image. Be gentle and precise. This step creates a neat finish.
Reviewing The Drawing
Examine the drawing for any mistakes. Check the proportions and shapes. Ensure the canoe looks balanced. Make adjustments where needed. Look for areas lacking detail. Add shading to enhance depth. This review improves the drawing’s overall quality.
Frequently Asked Questions
How To Sketch A Canoe?
Begin by drawing a long, narrow oval for the canoe’s body. Add curved lines for the sides. Sketch a pointed end for the bow and stern. Include seats inside the canoe. Add details like paddles and textures for realism. Use shading to emphasize depth and dimension.
How To Canoe For Beginners?
Start with basic paddling techniques using a lightweight canoe. Practice balance and steering in calm waters. Wear a life jacket for safety. Learn to enter and exit the canoe smoothly. Familiarize yourself with essential gear like paddles and dry bags.
Join a beginner-friendly group for guided experience.
How To Draw A Canal Boat Easy Step By Step?
Begin by sketching a long rectangle for the boat’s body. Add a smaller rectangle for the cabin. Draw circles for portholes. Outline the roof and add a chimney. Sketch waves beneath for water. Use a pencil for initial lines, then color and add details.
How To Draw A River Easily For Beginners?
Start with a wavy line for the river’s path. Add parallel lines for banks. Sketch surrounding trees and rocks for detail. Use light blue for water, green for vegetation. Enhance with darker shades for depth. Keep it simple and practice regularly.
Conclusion
Drawing a canoe can be simple and fun. Follow the steps and practice. Each line and curve adds character to your canoe. Don’t worry about mistakes; they help you learn. Keep your pencils sharp and your mind open. Enjoy the process and see your skills grow.
Share your artwork with friends and family. Encourage them to try drawing too. Remember, every artist started somewhere. You can create something unique and beautiful. Keep drawing, and you’ll improve over time. Happy sketching!