

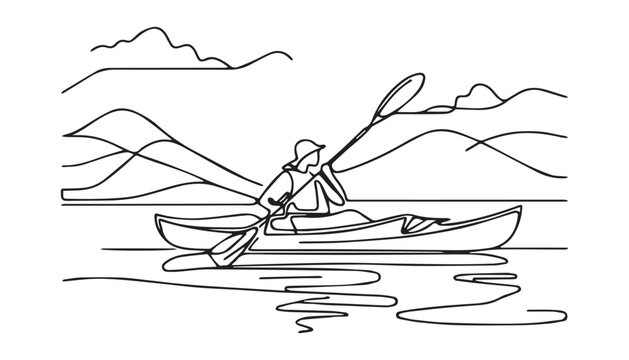
Are you ready to unleash your inner artist and capture the serene beauty of a kayak gliding through the water? Drawing a kayak might seem challenging at first, but with a few simple steps, you can create a stunning piece of art that reflects your passion for the outdoors.
Imagine the satisfaction of sketching your own kayak scene, where every curve and detail tells a story of adventure and tranquility. Whether you’re a beginner or looking to refine your skills, this guide will transform your blank page into a vibrant masterpiece.
So grab your pencils, clear your mind, and let’s dive into the world of kayak drawing. You’re about to discover just how easy and enjoyable it can be!
Materials Needed
Gather paper, pencils, and erasers to draw a kayak. Include colored pencils for adding vibrant details. A ruler helps with straight lines, enhancing precision in your drawing.
Drawing a kayak can be a rewarding experience, bringing your artistic abilities to life while capturing the sleek lines of this popular watercraft. Before you begin, it’s essential to gather the right materials to ensure your drawing process is smooth and effective. With the correct tools in hand, you’ll be better equipped to translate your vision onto paper, allowing creativity to flow seamlessly. Let’s explore what you’ll need to get started.Drawing Paper
Choose a high-quality drawing paper that can handle erasing and multiple layers of graphite or ink. A thicker paper will prevent smudging and tearing, providing a sturdy base for your artwork. Consider using a sketchbook for easy portability.Pencils
A variety of pencils will give you flexibility in shading and detailing. Start with an HB pencil for initial sketches, then use softer pencils like 2B or 4B for darker lines. Mechanical pencils can also be handy for fine details.Eraser
Invest in a good-quality eraser that won’t damage your paper. A kneaded eraser is excellent for subtle adjustments, while a vinyl eraser can handle more significant corrections. Keep them clean to ensure precision in erasing.Ruler And Compass
Straight lines and perfect circles are often needed in kayak drawings, especially for the hull and cockpit. A ruler will help with the kayak’s length, while a compass is perfect for drawing curved lines smoothly.Fine Liners And Markers
To outline your final drawing, use fine liners for precision. Different tip sizes can help you emphasize certain areas. For added color, consider using markers to bring vibrancy to your kayak illustration.Reference Images
Having a clear reference image can greatly improve the accuracy of your drawing. Look for photos that show different angles of the kayak to understand its structure better. Print them out or keep them on a device nearby.Optional: Colored Pencils Or Watercolors
If you wish to add color to your drawing, colored pencils or watercolors can add depth and realism. Choose colors that reflect the kayak’s real-life counterparts or let your imagination guide you to create a unique design. Are you ready to embark on your kayak drawing journey? With these materials by your side, you’re well-prepared to capture the essence of this sleek watercraft. What unique elements will you incorporate into your drawing to make it your own?
Credit: www.freepik.com
Setting Up Your Workspace
Setting Up Your Workspace Prepare a clean, well-lit area with all your drawing tools nearby. Ensure your chair and desk are comfortable to maintain focus while drawing.
Setting up your workspace for drawing a kayak is an essential first step. It can set the tone for your creative process and help you focus on the task at hand. A well-organized space not only minimizes distractions but also provides easy access to your materials, allowing you to immerse yourself in your drawing adventure.Choose A Well-lit Area
Natural light can significantly enhance your drawing experience. Position your workspace near a window to benefit from sunlight during the day. If natural light is limited, consider using a bright desk lamp to ensure your area is well-lit. A well-illuminated space helps you see the details in your drawing more clearly.Organize Your Drawing Tools
Having your drawing tools within arm’s reach can save you time and keep your focus intact. Arrange your pencils, erasers, and paper neatly on your desk or in a small container. This organization helps you stay in the flow of creativity without having to search for missing tools.Maintain A Comfortable Environment
Comfort is key to long drawing sessions. Ensure your chair provides good support and is at the right height for your desk. You might want to add a cushion for extra comfort. A comfortable workspace makes it easier to concentrate on your drawing without physical discomfort.Minimize Distractions
A clutter-free environment encourages concentration. Clear your workspace of any unrelated items that might distract you. Turn off notifications on your devices or keep them out of reach. A distraction-free zone helps you stay focused on your kayak drawing.Personalize Your Space
Adding personal touches to your workspace can inspire creativity. Consider hanging a motivational poster or placing a small plant nearby. These elements can make your workspace more inviting and stimulate your imagination as you draw. Creating a conducive workspace is more than just arranging your materials—it’s about fostering an environment that nurtures creativity. How do you plan to set up your workspace for drawing your kayak?Basic Shapes And Guidelines
Understanding the basic shapes and guidelines is crucial for drawing a kayak. By breaking down the kayak into simple components, you can create a realistic and proportionate drawing. Focus on the hull, deck, and cockpit to build a strong foundation. Let’s explore each part with easy-to-follow steps.
Drawing The Hull
The hull is the kayak’s bottom part. Start with an elongated oval shape. This represents the hull’s base. Ensure the oval is slightly pointed at both ends. This gives the hull a streamlined look, typical of kayaks. Add a horizontal guideline through the center of the oval. This helps maintain symmetry while drawing.
Sketching The Deck
Above the hull, sketch a narrower oval for the deck. The deck sits atop the hull and is slightly smaller. Align it with the hull’s center guideline for balance. Connect the edges of the hull and deck with smooth lines. These lines form the kayak’s sides, creating a three-dimensional appearance.
Adding The Cockpit
Position the cockpit slightly behind the deck’s center. Draw a small oval or rectangle to represent the cockpit opening. Ensure it’s wide enough for a paddler to fit. Add a vertical guideline through the cockpit. This helps in aligning further details like seats or paddles.
Credit: stock.adobe.com
Detailing The Kayak
Begin by sketching the kayak’s sleek body shape, focusing on its elongated form. Add the curved lines for the cockpit, ensuring it is proportionate. Finish by detailing the paddles, highlighting their symmetry and position relative to the kayak.
Detailing a kayak drawing can enhance its realism and charm. To make your kayak sketch stand out, focus on the key elements like the paddle, seat, and safety features. These details not only bring the kayak to life but also add depth to your artwork. Let’s explore how to include these crucial components.Creating The Paddle
The paddle is essential for any kayak. Start by sketching two long, slender handles. Ensure they are parallel and evenly spaced. At each end, draw a flat, oval blade. Keep the blades symmetrical for balance. Shade the paddle lightly for a realistic touch. This will add dimension to your drawing.Drawing The Seat
A kayak’s seat is crucial for comfort. Begin with a simple rectangle in the kayak’s center. Add a slight curve to its top for a natural look. Draw horizontal lines for the seat’s texture. These lines create the appearance of padding. Add some shadows underneath for depth.Adding Safety Features
Safety features are important in any kayak design. Draw small loops on the kayak’s sides for straps. Include a whistle or a small buoy for emergencies. Sketch these items near the seat for easy access. Add reflective strips for visibility in low light. These details ensure your kayak is safe and ready for adventure.Refining Your Drawing
Refining your drawing skills involves understanding kayak shapes and details. Start with the basic outline of the kayak. Add features like paddles and seating to bring your drawing to life.
Refining your drawing brings your kayak sketch to life. This stage focuses on enhancing details, achieving depth, and capturing realistic elements. Every stroke contributes to the final masterpiece. This section will guide you on enhancing lines, curves, and mastering shading techniques.Enhancing Lines And Curves
Strong lines define the kayak’s silhouette. Start by sharpening the edges with a firm grip on your pencil. Smooth curves make the kayak appear sleek. Practice drawing arcs for the kayak’s body. Gentle pressure creates graceful curves. Pay attention to the symmetry of the kayak’s outline. Use a ruler for precision if needed. Make sure the kayak looks balanced and streamlined.Shading Techniques
Shading adds depth to your kayak drawing. Begin with light shadows on the hull. Use soft pencils for gentle shading. Gradually darken the areas under seats and paddles. Highlight the kayak’s surface with brighter strokes. Contrast makes the drawing pop. Experiment with different shading styles. Cross-hatching creates texture. Blending with a smudging tool softens shadows. Enhance the realism by observing real-life kayaks. Notice how light hits different parts. Use this knowledge to refine your shading.Adding Final Touches
Adding final touches to your kayak drawing can bring it to life. Enhance the curves and refine the paddle details. Adjust shading to emphasize depth and texture, capturing the essence of a kayak on water.
Adding final touches to your kayak drawing brings it to life. This stage is where the magic happens, transforming a basic sketch into a vivid representation. These details make your artwork unique and captivating. Let’s explore ways to enhance your kayak drawing.Incorporating Water Elements
Drawing water adds realism to your kayak sketch. Begin with gentle waves or ripples around the kayak. Use curved lines to mimic the flow of water. Vary the thickness of lines for depth and movement. Adding reflections enhances the illusion of water. Reflections should mirror the kayak’s shape and color. Consider sketching splashes to show motion. Little droplets can suggest speed or impact. These elements make the kayak part of its environment.Personalizing Your Design
Make your kayak drawing uniquely yours. Add personal touches like stickers or logos. Sketch patterns or stripes on the kayak’s body. These details reflect your style and interests. Experiment with color choices. Bold colors can make your drawing pop. Soft hues create a peaceful scene. Consider adding accessories like paddles or life jackets. These items add context and realism. Personalizing your design makes your artwork stand out.Common Mistakes To Avoid
Mistakes like ignoring proportion, using uneven lines, or skipping details can ruin your kayak drawing. Focus on symmetry and outline accuracy to achieve a realistic look.
Drawing a kayak might seem straightforward, but there are common pitfalls that can derail your efforts. Recognizing these mistakes early will save you time and help perfect your technique. Below, we delve into some of the most typical errors and how you can avoid them.Incorrect Proportions
A common mistake is getting the proportions wrong. Kayaks have a unique silhouette with a narrow, elongated shape. Use a reference image to ensure the body is neither too wide nor too short. Measure the length and width to maintain balance.Ignoring Details
Many overlook the finer details like the cockpit and paddle. These elements add authenticity to your drawing. Pay attention to the contours and shapes within the kayak’s body. Details can elevate a simple drawing into a realistic representation.Misjudging Perspective
Perspective can be tricky, especially with cylindrical objects like kayaks. Avoid a flat appearance by incorporating angles and depth. Visualize how the kayak would look from different viewpoints. This will help enhance the three-dimensional effect.Neglecting Shadows
Shadows are crucial for realism. Without them, your kayak might appear flat and lifeless. Consider where the light source is coming from and how it impacts the kayak’s surfaces. Add subtle shading under the hull and around the cockpit for depth.Overcomplicating The Design
Beginners often add unnecessary complexity. Simplify your approach by focusing on the basic kayak structure first. Once you’re comfortable, gradually introduce more intricate features like patterns or textures. Keep it simple to start, then build complexity. Reflect on your experiences with drawing. Have you faced these challenges? What strategies helped you overcome them? Your insights could guide others on their artistic journey.Tips For Improvement
Focus on basic kayak shapes first. Practice sketching smooth lines and curves. Observe real kayaks for accurate proportions and details.
Improving your kayak drawing skills can be a rewarding journey. With the right tips, you can transform a simple sketch into a masterpiece. Whether you’re a novice or have some experience, there’s always room to enhance your technique. Let’s dive into some practical advice to elevate your kayak illustrations.Understand Kayak Anatomy
Knowing the structure of a kayak can significantly boost your drawing accuracy. Pay attention to the hull shape, cockpit size, and paddle details. Familiarize yourself with different kayak types and their unique features. This understanding will allow you to create more realistic and detailed sketches.Practice With Different Perspectives
Experiment with various angles to capture the kayak’s essence. Try drawing from above, side, or a three-quarter view. Each perspective offers a unique challenge and can add depth to your illustrations. Don’t be afraid to try new viewpoints to expand your skill set.Refine Your Shading Techniques
Shading brings your kayak drawing to life. Practice using light and shadow to highlight curves and contours. Focus on where the light source is coming from and how it affects different parts of the kayak. This will help in creating a more dynamic and realistic image.Use Reference Images
Reference images can be invaluable for improving your drawing. Study real-life kayak photos or illustrations to understand proportions and details. Use these images as a guide, but add your own style and creativity. Reference images can serve as a starting point for your unique artistic expression.Seek Feedback And Critique
Don’t hesitate to ask others for their opinions on your drawings. Constructive feedback can provide insights you might have overlooked. Engage with other artists or join online forums to share your work. This interaction can inspire new ideas and approaches for your future projects.Set Goals For Your Progress
Establish specific objectives to track your improvement. Decide on aspects you wish to enhance, such as line quality or proportion accuracy. Setting clear goals will motivate you and provide a sense of accomplishment. Regularly revisit these goals to see how far you’ve come in your drawing journey. Remember, every sketch is a step forward. What new techniques will you try in your next kayak drawing?
Credit: www.dreamstime.com
Frequently Asked Questions
How To Kayak Simple?
Start by choosing a beginner-friendly kayak. Wear a life jacket for safety. Learn basic paddling techniques. Practice balance and control. Enjoy paddling in calm waters.
How To Draw A Pelican For Beginners?
Begin by drawing a large oval for the pelican’s body. Add a smaller oval for the head. Sketch a long, curved line for the beak. Draw wings using curved lines. Add legs with webbed feet. Outline the tail. Finish with details like eyes and feathers.
How To Draw A River Easily For Beginners?
Begin by sketching two wavy lines parallel to each other. Vary the thickness for a natural look. Add small rocks and plants along the edges. Shade the river for depth, and use light blue for water. Practice regularly to improve your skills.
How To Roll A Kayak Step By Step?
Start by practicing hip snap movements. Position yourself correctly in the kayak. Use a paddle sweep or brace. Engage your core and hips to roll. Finish by adjusting your body and paddle position to stabilize.
Conclusion
Drawing a kayak can be a fun activity. You’ve learned the basics here. Practice is key. Each sketch will improve your skills. Remember to start with simple shapes. Gradually add details. Don’t rush the process. Enjoy the creativity. Your unique style will emerge with time.
Share your drawings with friends. Get feedback and grow. Keep exploring new techniques. Stay inspired by nature and water. There’s always more to learn. Drawing can be a relaxing escape. Grab your pencil and start sketching. Let your imagination flow.
Happy drawing!


