
If you’re an avid kayaker, you know the joy of paddling through serene waters, feeling the rhythmic splash as you glide along. But what happens when your trusty kayak springs a leak?
A hole in your kayak can be a real downer, threatening to dampen your adventures and your spirit. But fear not! You’re about to discover the simple steps to get your kayak back in prime condition, all by yourself. Imagine the relief of knowing you can handle this fix and the confidence that comes with mastering a new skill.
Dive into this guide and learn how to patch up your kayak like a pro, ensuring your next adventure is just around the corner.

Credit: www.youtube.com
Assess The Damage
Assess the damage by inspecting the kayak thoroughly. Identify the size and location of the hole. This helps determine the necessary repair method.
Assessing the damage on a kayak is crucial before repairs. Knowing what you’re dealing with helps you choose the right fix. First, take a close look at the kayak to understand the scope of the damage. Is it a small crack or a larger hole? This initial check saves time and effort later.Inspect For Cracks And Holes
Begin by examining the kayak thoroughly. Pay special attention to the bottom and sides. These areas often face the most wear and tear. Look for any visible cracks or holes. Use a flashlight if necessary. Small cracks might be hard to spot. Feel the surface with your hands. Sometimes, you can feel imperfections that are hard to see.Identify Material Type
Knowing the kayak’s material is essential for effective repair. Most kayaks are made from polyethylene, fiberglass, or composite materials. Polyethylene is common and flexible. Fiberglass is lighter but more fragile. Composite kayaks are high-quality and durable. Each material requires different repair techniques. Check the kayak’s manual or manufacturer’s information. This guides you on the correct repair method.
Credit: hub.jacksonkayak.com
Gather Necessary Tools
Fixing a hole in your kayak begins with gathering the right tools. Having everything you need beforehand makes the repair process smooth and efficient. This section will guide you on what tools to prepare to tackle the task effectively.
Essential Repair Kits
Repair kits are vital for kayak maintenance. Choose a kit designed for your kayak material, whether plastic or fiberglass. These kits typically include patches, adhesive, and sandpaper. Ensure the adhesive is waterproof to withstand aquatic conditions. You may also need a heat gun for plastic kayaks to help mold patches seamlessly.
Safety Equipment
Safety is key when repairing your kayak. Use gloves to protect your hands from adhesives and sharp tools. Safety goggles shield your eyes from debris and chemical fumes. Consider wearing a mask if using strong adhesives or heat guns. Always work in a well-ventilated area to prevent inhaling harmful fumes.
Prepare The Surface
Thoroughly clean the kayak’s damaged area with soap and water. Remove dirt, grime, and any loose particles. Ensure the surface is completely dry before proceeding to the next repair steps.
To repair a hole in a kayak, the surface preparation is crucial. This step ensures a smooth and lasting repair. A clean and well-prepared surface helps adhesives bond better. It also prevents further damage. Follow these simple steps to prepare the surface for repair.Clean The Area
Start by cleaning the damaged area thoroughly. Remove any dirt or debris. Use a mild soap and water solution. Rinse the surface well to remove soap residue. Dry the area completely using a soft cloth or towel. This step prevents moisture from affecting the repair process.Sand The Edges
Sanding the edges helps create a smooth surface. Use fine-grit sandpaper for this task. Sand gently around the hole’s edges. Ensure you remove rough patches and sharp edges. This creates a better surface for patch adhesion. Wipe away dust with a clean, dry cloth afterward.Patch The Hole
Patch the Hole Fixing a hole in a kayak can extend its life and ensure safe adventures. Start by cleaning the damaged area thoroughly. Apply a suitable repair kit or marine-grade adhesive to seal the hole securely.
Patching a hole in your kayak is crucial for safety. Water can seep in and make the kayak unstable. Fixing the hole ensures your kayak stays afloat. You can use different methods to patch the hole. Choose the right one based on the kayak material. Below are two effective ways to patch a hole.Apply Repair Tape Or Sealant
Using repair tape or sealant is simple. Clean the area around the hole first. Ensure it’s dry and free of dirt. Cut a piece of repair tape slightly larger than the hole. Place the tape over the hole, pressing firmly. If using sealant, apply it generously over the hole. Smooth it out with a spatula or your finger. Let it dry as per the instructions. This method works well for small holes.Use Heat For Plastic Welding
Plastic welding is effective for larger holes. Begin by cleaning the area around the hole. Use a heat gun to soften the plastic edges. Use a plastic welding rod to fill the hole. Press the rod into the softened area. Move slowly to ensure even coverage. Let the plastic cool and harden. This creates a strong, lasting repair.Reinforce The Repair
Strengthen the kayak by applying fiberglass cloth and resin over the hole. Ensure a seamless finish for durability.
Reinforcing the repair on your kayak is crucial for ensuring its longevity and maintaining its performance on the water. After patching up the hole, you need to add strength and durability to the repair. This step guarantees that your kayak remains reliable, even in the toughest conditions. Let’s dive into how you can add fiberglass for strength and seal it with waterproof epoxy to fortify your repair.Add Fiberglass For Strength
Adding fiberglass to your kayak repair can enhance its durability significantly. Begin by cutting a piece of fiberglass cloth that extends at least two inches beyond the edges of the repaired area. This will ensure comprehensive coverage and support. Lay the fiberglass over the patch and saturate it with resin, using a brush to smooth out any air bubbles. This process creates a strong bond that integrates seamlessly with the kayak’s surface. Allow it to cure completely before moving on to the next step.Seal With Waterproof Epoxy
Sealing the repair with waterproof epoxy is essential to prevent water infiltration. After the fiberglass has cured, apply a layer of waterproof epoxy over the area. This creates a watertight seal that protects the repair from moisture. Use a small brush to cover the entire patch and its edges thoroughly. This not only reinforces the repair but also ensures that it withstands prolonged exposure to water. Let the epoxy dry completely; patience here pays off in the long run. Have you ever wondered why some kayak repairs fail while others last for years? The secret often lies in these crucial reinforcement steps. By taking the time to add fiberglass and seal with epoxy, you’re not just fixing your kayak—you’re safeguarding your adventures on the water.Test For Leaks
Check for leaks by filling the kayak with water and observing any seepage. Mark the spots where water escapes. Identifying the leak is crucial before starting any repair.
Testing for leaks is a crucial step in fixing a hole in your kayak. Identifying the exact location of leaks ensures a thorough repair. Follow these simple methods to pinpoint any leaks and get your kayak ready for adventure.Fill With Water
Turn the kayak upside down. Find a stable spot to work. Use a garden hose or bucket. Fill the inside of the kayak with water. This step helps pinpoint leaks. Water will escape through any holes. Watch closely as you fill. Ensure the kayak is level to avoid spills.Check For Drips
Observe the kayak’s underside. Look for dripping water. Each drip marks a potential leak. Mark these spots with a waterproof marker. Be thorough in your inspection. Even small drips matter. Dry the kayak completely after checking. This step prevents further damage. Use towels or let it air dry.Maintain Your Kayak
Fixing a hole in a kayak requires a few simple steps. Clean the damaged area thoroughly to remove dirt and debris. Use a plastic welding kit or marine-grade epoxy to seal the hole, ensuring it’s watertight.
Maintaining your kayak is crucial to ensure its longevity and performance. Kayaks are exposed to various environmental elements, which can lead to wear and tear over time. By regularly inspecting and protecting your kayak, you can prevent small issues from escalating into bigger problems.Regular Inspections
Establish a routine to check your kayak for any signs of damage or wear. Look for scratches, dents, and potential weak spots, especially around seams and joints. Feel the hull for any irregularities. A quick inspection can save you time and money in the long run. Is there anything more satisfying than spotting a problem before it becomes a major issue? Create a checklist of areas to inspect, and make it a habit after every few paddling sessions. This proactive approach keeps your kayak in top shape.Protective Measures
Consider applying a UV protectant to shield your kayak from sun damage. Exposure to sunlight can weaken the material and fade its color. This simple step can prolong the life of your kayak. Store your kayak correctly. Keeping it off the ground and away from harsh weather can prevent unnecessary damage. A kayak cover can also be a good investment for added protection. Think about the surfaces you drag your kayak on—rough terrain can cause abrasions. Use kayak carts or carry it to minimize contact with harsh surfaces. Why not take an extra step to preserve your kayak’s integrity?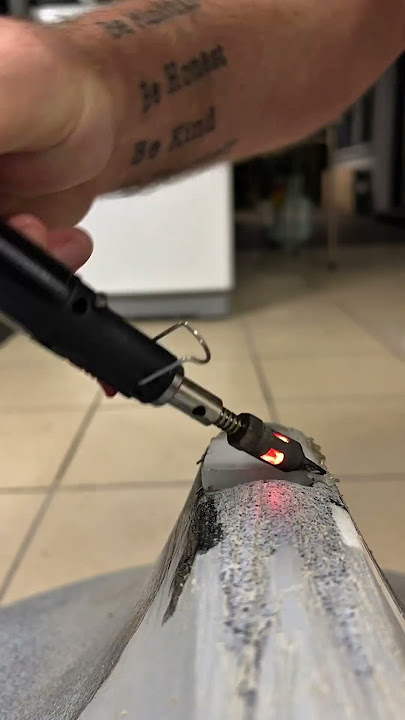
Credit: www.youtube.com
Frequently Asked Questions
Can You Fix A Hole In A Kayak?
Yes, you can fix a hole in a kayak. Use a patch kit or waterproof tape for small holes. For larger damages, apply a fiberglass or plastic repair kit. Ensure the surface is clean and dry before starting the repair process.
Always follow the manufacturer’s instructions for best results.
Will Flex Seal Work On A Kayak?
Flex Seal can work on a kayak for minor repairs. Ensure surfaces are clean and dry before application. It provides a waterproof seal but isn’t a permanent solution for significant damage. Regularly check and maintain the kayak’s integrity for safety.
How To Repair A Puncture In A Kayak?
Clean the punctured area with soapy water. Dry it completely. Apply a vinyl repair patch using strong adhesive. Press firmly and let it dry for at least 24 hours. Test for leaks by submerging in water.
How To Patch A Hole In Hard Plastic?
Clean the area around the hole. Sand it lightly to create a rough surface. Apply plastic epoxy or adhesive. Press a patch onto the adhesive. Allow it to cure according to the manufacturer’s instructions. Sand the patched area smoothly once dry.
Conclusion
Fixing a kayak hole is simpler than you might think. Gather the right tools first. Clean the damaged area thoroughly. Use a reliable patch kit. Follow the instructions carefully. Ensure a tight seal for safety. Let the patch dry completely.
Test your repair in water. Regular maintenance helps avoid future holes. Enjoy your adventures with confidence. Always inspect your kayak before use. Proper care extends your kayak’s life. A little effort now saves trouble later. Happy paddling!


