
Imagine setting out on a serene lake, the sun casting a golden glow on the water, and your kayak gently slicing through the surface. It’s a picture-perfect moment that starts with a simple yet crucial task: inflating your kayak.
Whether you’re a seasoned paddler or a newbie eager to explore, knowing how to properly inflate your kayak can make or break your adventure. You might think it’s as easy as just pumping air into it, but there’s more to it than meets the eye.
The right inflation can ensure safety, stability, and a smoother ride. Plus, you’ll avoid the frustrating mishaps that can deflate your excitement—literally. In this guide, you’ll discover step-by-step instructions and insider tips that make inflating your kayak a breeze. By the time you finish reading, you’ll be equipped with the knowledge to get your kayak ready quickly and efficiently, so you can focus on what truly matters: enjoying the water. So, are you ready to dive into the details and make your kayaking experience unforgettable? Let’s get started!
Choosing The Right Inflatable Kayak
Choosing the right inflatable kayak can be a game-changer for your water adventures. The ideal kayak should match your intended use, be easy to handle, and offer durability. It’s not just about inflating; it’s about ensuring a seamless, enjoyable experience on the water. Let’s dive into what you need to know to make the best choice.
Types Of Inflatable Kayaks
Inflatable kayaks come in various styles, each catering to different needs. Are you planning to paddle solo or with a partner? Consider:
- Solo kayaks:Perfect for individual paddlers. They’re lightweight and easy to maneuver.
- Tandem kayaks:Great for couples or friends who want to explore together. They offer more space but require teamwork.
- Fishing kayaks:Equipped with holders and extra stability, they are designed for anglers.
Think about where you’ll use your kayak most often. A river kayak differs from an ocean kayak in build and stability.
Material Considerations
The material of your inflatable kayak is crucial for performance and longevity. You want something that withstands wear and tear but is still light enough to carry. Consider these materials:
- PVC:Highly durable and resistant to punctures. Common in many inflatable kayaks.
- Hypalon:Known for UV resistance, ideal for prolonged sun exposure. It’s pricier but offers exceptional quality.
- Nitrylon:A more eco-friendly option that provides durability similar to PVC.
Imagine battling a rocky shore with a flimsy kayak material. It’s all about balancing sturdiness with portability. What matters more to you, durability or ease of transport?

Credit: www.youtube.com
Pre-inflation Preparations
Before inflating your kayak, proper preparations are crucial. These steps ensure a smooth and safe adventure. Start with a thorough inspection. Gather all necessary tools to facilitate the inflation process.
Inspecting The Kayak
Check the kayak for any visible damage. Look for tears or punctures. Ensure the valves are functional and secure. A faulty valve can lead to deflation during your trip. Examine seams for any signs of wear. Confirm that the kayak material is in good condition. This prevents unexpected leaks while on water.
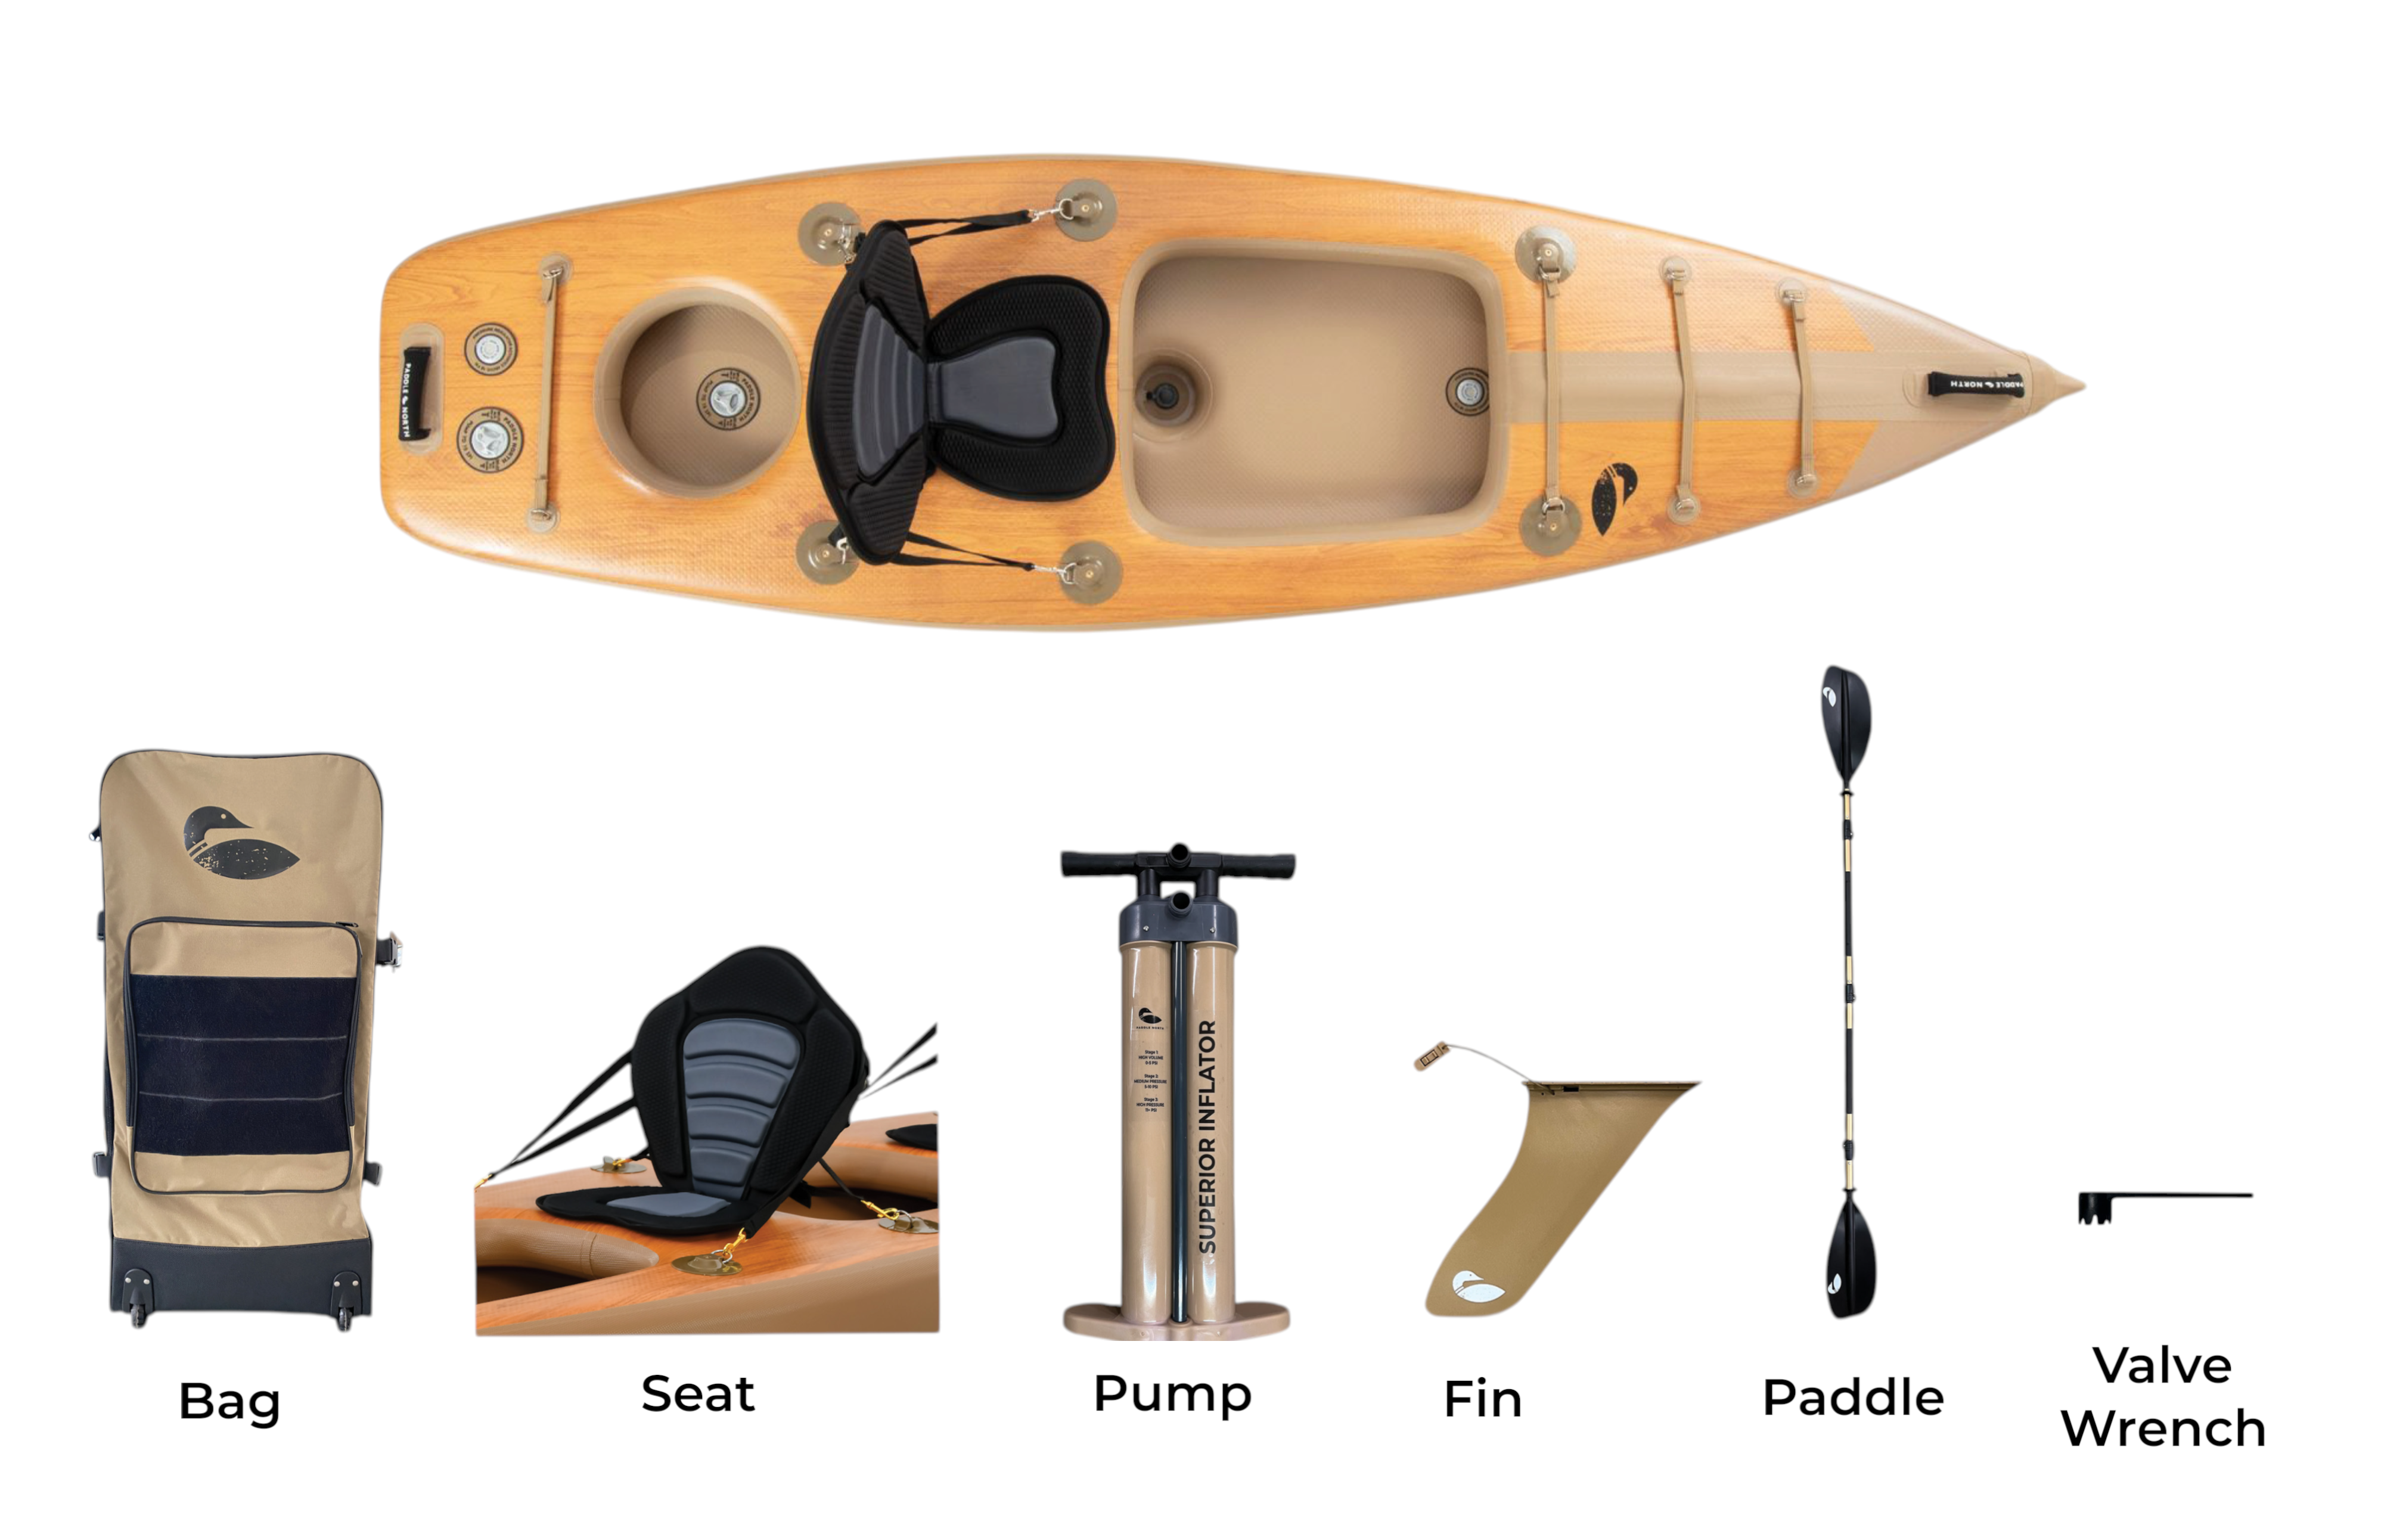
Gathering Necessary Equipment
Collect all the tools you’ll need. Have an air pump ready, preferably a manual or electric one. Manual pumps are handy for remote areas. Electric pumps speed up the process. Carry a pressure gauge if your pump doesn’t have one. The gauge ensures the kayak is inflated to the right pressure. Prepare a repair kit in case of emergencies. Include patches and adhesive for quick fixes. Having these items ensures you are well-prepared for inflation.
Inflation Techniques
Learn how to inflate a kayak efficiently. Use a hand or electric pump for quick inflation. Ensure valves are tightly sealed to prevent air leaks, keeping your kayak buoyant and ready for adventure.
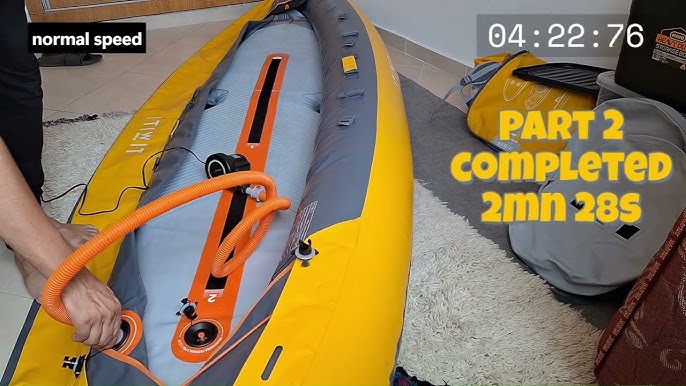
Inflating a kayak properly ensures a safe and enjoyable paddling experience. Choosing the right inflation technique can make this task easier and more efficient. Below, you’ll find methods for using both manual and electric pumps.Manual Pump Methods
Manual pumps are reliable and do not need electricity. They are lightweight and easy to carry. Hand pumps require physical effort but give you control over inflation. Foot pumps, on the other hand, can make inflation easier. They allow you to use your leg muscles, which are stronger. Using a manual pump is straightforward. Begin by attaching the pump’s hose to the kayak’s valve. Make sure it fits snugly. Start pumping steadily, ensuring the air flows smoothly into the kayak. Regularly check the firmness of the kayak. Stop when it feels firm to the touch.Electric Pump Advantages
Electric pumps are perfect for quick and effortless inflation. They are powered by batteries or can plug into a car outlet. These pumps save time, especially when inflating larger kayaks. They require less physical effort compared to manual methods. To use an electric pump, connect it to the kayak’s valve. Ensure the connection is secure. Turn on the pump and let it do the work. Monitor the inflation to avoid over-inflating the kayak. Once the kayak feels firm, turn off the pump. Choosing the right pump depends on your needs. Consider the kayak size and your physical ability. Both manual and electric pumps have their benefits. Select the method that best suits your kayaking routine.Ensuring Proper Pressure
Ensuring proper pressure is crucial for a safe kayak adventure. Inflate your kayak by using a reliable air pump. Check the pressure gauge frequently to avoid overinflation, which can damage your kayak.
Inflating a kayak to the correct pressure is crucial for a safe and enjoyable paddling experience. Too little air, and your kayak may sag, making it sluggish and hard to control. Over-inflate, and you risk damaging the material or even popping a seam. Getting the pressure just right ensures your kayak performs as intended, gliding smoothly over water.Understanding Psi Levels
Knowing the PSI (pounds per square inch) recommended for your kayak is vital. Each kayak model has a specific PSI range that ensures optimal performance. Check your manual or the kayak for a label indicating the ideal PSI. Most inflatable kayaks range between 1.5 to 3 PSI, but always confirm with your specific model. Using a pressure gauge helps achieve the right balance. Many pumps come with built-in gauges, allowing you to monitor the pressure as you inflate. If yours doesn’t, consider investing in a standalone gauge. This small tool can save you from over or under-inflating your kayak.Checking For Leaks
Once inflated, it’s wise to check for leaks before hitting the water. A simple way is to apply a soapy water solution to the seams and valves. Look for bubbles forming, which indicate escaping air. Ensure valves are tightly secured; even a minor gap can lead to deflation. Gently press down on the kayak and listen for any hissing sounds. If you detect a leak, patch it up immediately with a repair kit. By regularly inspecting for leaks, you extend the life of your kayak. Taking a few extra minutes to ensure proper pressure can make your adventures safer and more enjoyable. Have you ever been caught off guard by an unexpected leak? Share your experience in the comments below!Securing Valves And Fittings
Inflating a kayak starts with securing valves and fittings to prevent air leaks. Ensure each valve is tightly closed. Use a pump to inflate, checking for firmness without over-inflating. Properly secured fittings maintain the kayak’s shape and performance in water.
Securing valves and fittings is crucial for kayak inflation. A well-secured valve ensures the kayak stays inflated. Proper fittings prevent air leaks, ensuring a smooth kayaking experience. Understanding the types of valves and proper closure techniques helps in maintaining kayak integrity. Below, we explore the types of valves and how to close them effectively.Types Of Valves
Kayaks use different valve types for inflation. The most common is the Boston valve. It’s a two-part valve that allows quick inflation and deflation. Twist-lock valves are also popular. They are simple to use and provide a secure seal. Halkey-Roberts valves are another type, often found in high-end kayaks. They offer efficient air retention and are durable. Understanding your kayak’s valve type is essential. It ensures correct inflation and deflation.Proper Valve Closure
Proper valve closure is vital for maintaining air pressure. For Boston valves, ensure both parts are tightly connected. This prevents any air leakage. Twist-lock valves require a simple twist to secure. Make sure it clicks into place for a tight seal. With Halkey-Roberts valves, press the cap down firmly. Then, twist it to lock securely. Always double-check the valve after inflation. This guarantees your kayak stays inflated during your adventure.Safety Tips And Best Practices
Ensure you have a pump suitable for your kayak. Check the valves for any dust or debris. Inflate the kayak in a clear area away from sharp objects. Inflate it until firm, but not overly tight. Regularly inspect for leaks by listening for escaping air.
Inflating a kayak requires attention to safety and best practices. Proper inflation ensures a smooth and enjoyable kayaking experience. Being mindful of the correct methods protects both the kayak and its user. Following these safety tips helps prevent accidents and prolongs the life of your kayak.Avoiding Over-inflation
Over-inflation can damage the kayak. It may lead to leaks or bursts. Always monitor the pressure as you inflate. Use a reliable pressure gauge for accuracy. Avoid inflating in direct sunlight. Heat increases pressure inside the kayak. If unsure, check the manufacturer’s guidelines. They provide the recommended pressure range. This ensures safe and effective inflation.Storage And Maintenance
Proper storage extends the life of your kayak. Keep it in a cool, dry place. Avoid exposure to sharp objects. Clean the kayak thoroughly after each use. Use fresh water to rinse off salt and dirt. Check for leaks or damage regularly. Repair any issues promptly to avoid bigger problems. Store the kayak with a slight deflation. This prevents strain on the seams and material. Regular maintenance keeps your kayak in top condition.Troubleshooting Common Issues
Inflating a kayak might seem straightforward, but it can sometimes present unexpected challenges. Whether you’re on a peaceful lake or navigating through rugged rapids, encountering issues like punctures or pressure loss can disrupt your adventure. Understanding how to troubleshoot these common problems can save you time and frustration, ensuring your kayaking experience remains smooth and enjoyable.
Handling Punctures
Discovering a puncture in your kayak can be disheartening, but it’s not the end of your journey. Keep a repair kit handy, including patches and adhesive. Clean and dry the area around the puncture thoroughly before applying a patch to ensure it adheres properly.
Consider the type of patch you use. Some patches are designed for temporary fixes, while others provide a permanent solution. If you’re unsure, consult the kayak manufacturer’s guidelines or customer service for advice.
Have you ever wondered why punctures happen in the first place? Often, it’s due to sharp objects or improper storage. Inspect your kayak regularly for wear and tear, and store it in a safe place to prevent future issues.
Addressing Pressure Loss
Pressure loss can be tricky, especially if you’re in the middle of a trip. Start by checking the valves; a loose or damaged valve can cause gradual deflation. Tighten them securely, and if needed, replace any faulty parts.
Inflate your kayak slowly and evenly. Overinflating can lead to pressure loss or even damage. Use a pressure gauge to monitor levels, ensuring you’re within the recommended range for your kayak model.
Have you noticed your kayak losing pressure more in colder weather? Temperature changes can affect air pressure inside your kayak. Consider inflating your kayak indoors or during warmer conditions to maintain optimal pressure.
Remember, your kayak is an investment in adventure. Taking the time to address these issues not only prolongs its life but also enhances your overall experience. What other challenges have you faced while inflating your kayak, and how did you overcome them? Your insights might just help fellow kayakers on their next journey!
Credit: paddlenorth.com

Credit: www.youtube.com
Frequently Asked Questions
How To Properly Inflate A Kayak?
Ensure the kayak is clean before inflating. Use a manual or electric pump designed for kayaks. Inflate each chamber evenly, following manufacturer instructions. Check for proper pressure using a gauge. Secure valves tightly to prevent air leaks.
How To Inflate An Inflatable Without A Pump?
Use a hairdryer on the cool setting to inflate. You can also blow into the valve manually. Another option is using a vacuum cleaner with a reverse airflow setting. Ensure the valve is securely closed after inflating to prevent air leakage.
Can I Use An Air Compressor To Inflate A Kayak?
Yes, you can use an air compressor to inflate a kayak. Ensure you have the correct nozzle attachment. Monitor pressure to avoid over-inflation, which can damage the kayak. A compressor saves time and effort compared to manual pumps. Ideal for inflating quickly before kayaking adventures.
What Pump Do You Need For An Inflatable Kayak?
Choose a high-pressure pump for your inflatable kayak. Electric pumps are efficient and quick. Manual hand or foot pumps offer portability. Ensure the pump has the correct nozzle type for your kayak valve. A dual-action pump inflates quickly by pushing air on up and down strokes.
Conclusion
Inflating a kayak is simple with the right steps. Choose a proper pump. Attach it securely to the valve. Inflate gradually, checking firmness. Over-inflating can damage the kayak. Always stop when the kayak feels firm. Practice helps you become quick and confident.
Keep your pump handy for easy adjustments. Remember, a well-inflated kayak ensures a safe adventure. Enjoy your paddling journey with ease. Proper inflation gives you stability in water. Explore new places with your kayak. Feel the thrill of the water beneath.
Happy kayaking!


