
Are you ready to take your kayaking adventures to the next level? Whether you’re a seasoned paddler or just getting started, transporting your kayak safely and efficiently is key.
That’s where a kayak carrier comes in. But here’s the catch: installing one can seem daunting if you’ve never done it before. Fear not! We’re here to guide you through every step of the process. Imagine hitting the open road, your kayak securely fastened, and your mind at ease.
Intrigued? Keep reading to discover how easy it can be to install a kayak carrier and set yourself up for your next great adventure.
Choosing The Right Kayak Carrier
Choosing the right kayak carrier can make a big difference in your kayaking adventures. A well-selected carrier not only ensures the safety of your kayak but also saves you from unnecessary hassle during installation and transport. With various options available, understanding what fits your needs best is key. Let’s dive into some important aspects to consider.
Types Of Kayak Carriers
Kayak carriers come in several forms, each offering unique benefits. Roof-mounted carriers are popular for their space-saving design, allowing you to transport your kayak on top of your vehicle. Alternatively, trailer-style carriers provide easier loading and unloading, especially for larger kayaks. You might also consider stackers, which allow multiple kayaks to be transported simultaneously. Have you considered which type fits your kayaking style?
Compatibility With Your Vehicle
Ensuring your kayak carrier is compatible with your vehicle is crucial. Check the roof rack system of your vehicle; some carriers require specific types such as crossbars or rails. Measure your vehicle’s roof space to ensure the carrier fits comfortably without obstructing other functions. If you drive a compact car, you might want to explore lightweight carriers that won’t overwhelm your vehicle. Could your current setup support a kayak carrier effectively?

Credit: storeyourboard.com
Preparing Your Vehicle
Securely install a kayak carrier by first reading the instructions carefully. Attach the carrier to your vehicle’s roof racks. Use straps to ensure the kayak is tightly secured, preventing movement during transit.
Preparing your vehicle for a kayak carrier installation is crucial. The process ensures your kayak is securely mounted and ready for your next adventure. Attention to detail during preparation will make the installation smoother and safer. Let’s dive into some essential steps to get your vehicle ready.Cleaning The Roof
Before you start, take a moment to clean the roof of your vehicle. Dirt and debris can interfere with the installation process. Use a gentle soap and water mixture to remove any grime. Make sure to rinse thoroughly and dry the surface. A clean roof also prevents scratches and ensures the carrier attaches properly. Have you ever noticed how much easier it is to work on a clean surface?Checking Roof Rack System
Inspect your roof rack system to ensure it’s in good condition. A sturdy rack is critical for safely carrying your kayak. Check for any loose bolts or signs of rust. Tighten anything that seems out of place, and consider replacing rusty parts. Does your rack align perfectly with your vehicle’s body? An aligned rack will distribute weight evenly, reducing strain on your car.Gathering Necessary Tools
Gather essential tools like wrenches, screwdrivers, and measuring tape for installing a kayak carrier. Ensure you have the right mounting brackets and straps to secure the carrier safely.
Gathering Necessary Tools is a crucial step in installing your kayak carrier. Having the right tools ensures a smooth and efficient setup. It also minimizes the risk of damage to your vehicle or kayak. This section will guide you through the essential tools and safety equipment needed for a successful installation.Tools Required For Installation
To install a kayak carrier, you need specific tools. Most of these are common household items. Here’s a list to help you prepare:- Wrench or Socket Set:Essential for tightening bolts and screws.
- Screwdriver:Useful for securing smaller components.
- Measuring Tape:Ensures precise alignment and fitting.
- Allen Wrench:Often required for adjusting rack components.
Safety Equipment
Safety is a top priority during installation. Use proper safety equipment to protect yourself:- Gloves:Protect your hands from sharp edges.
- Safety Glasses:Shield your eyes from potential debris.
- Non-slip Footwear:Provides stability while working on uneven surfaces.
Installing The Carrier
Begin by placing the kayak carrier on your vehicle’s roof rack. Secure it tightly using the provided straps. Ensure it doesn’t move by checking all fastenings. Load your kayak carefully onto the carrier. Double-check stability before driving to your destination.
Installing a kayak carrier on your vehicle’s roof can seem daunting at first, but with a bit of guidance, it can be a straightforward task. The key is to take it step by step, ensuring everything is secure and properly aligned. This way, your kayak remains safe during transit, and you can focus on the adventure ahead.Positioning The Carrier
Begin by determining the best spot for your kayak carrier on the roof. Ideally, it should be centered to balance the weight evenly. This prevents any tilt that could affect your driving. Check your vehicle’s manual for any specific guidelines regarding roof load limits. Ignoring these could lead to damage or an unsafe ride. Once you’ve found the right spot, place the carrier on the roof, ensuring it aligns with any existing crossbars. If your vehicle doesn’t have crossbars, consider investing in a compatible set for added stability.Securing The Carrier To The Roof
With the carrier positioned, it’s time to secure it. Use the straps or clamps provided with your carrier, ensuring they are tightened properly. A loose carrier can be as problematic as not having one at all. Double-check each connection point, especially if you’re using clamps. They should be snug against the crossbars without too much give. Consider giving the carrier a gentle shake to test its stability. If it moves too much, revisit the straps or clamps. Would you feel comfortable driving with it as is? Ensuring the carrier is securely fastened not only protects your kayak but also enhances your peace of mind on the road. Proper installation means you can drive confidently, knowing your gear is safe.Loading The Kayak
Secure the kayak carrier to your vehicle’s roof rack carefully. Position the kayak with its hull facing upward. Straps should be tightened evenly to prevent movement during transit.
Loading your kayak onto the carrier can seem daunting, especially if you’re new to kayaking. However, with the right techniques and preparation, it becomes a seamless part of your adventure. Whether you’re heading out for a leisurely paddle or gearing up for an intense workout on the water, knowing how to safely and securely load your kayak is crucial.Lifting Techniques
Before attempting to lift your kayak, ensure you’re using the proper technique to avoid injury. Bend your knees and keep your back straight to leverage your leg strength. A kayak can be awkward to handle alone, so consider enlisting a friend to help. If you’re solo, a trolley or cart can be a game-changer. Roll the kayak close to your vehicle, using the cart to bear the weight. Then, slide it carefully into the carrier, reducing the need to lift entirely.Securing The Kayak
Once your kayak is in place, securing it is your next priority. Use sturdy straps to fasten the kayak tightly to the carrier. Ensure the straps are tight enough to prevent movement, but not so tight that they damage the kayak. Check the kayak’s stability by gently shaking it. If it wobbles, adjust the straps accordingly. A simple tip: twist the straps before securing them to prevent them from flapping in the wind, which can be both noisy and distracting while driving. Have you ever had a kayak shift during transport? Share your experiences and tips in the comments below!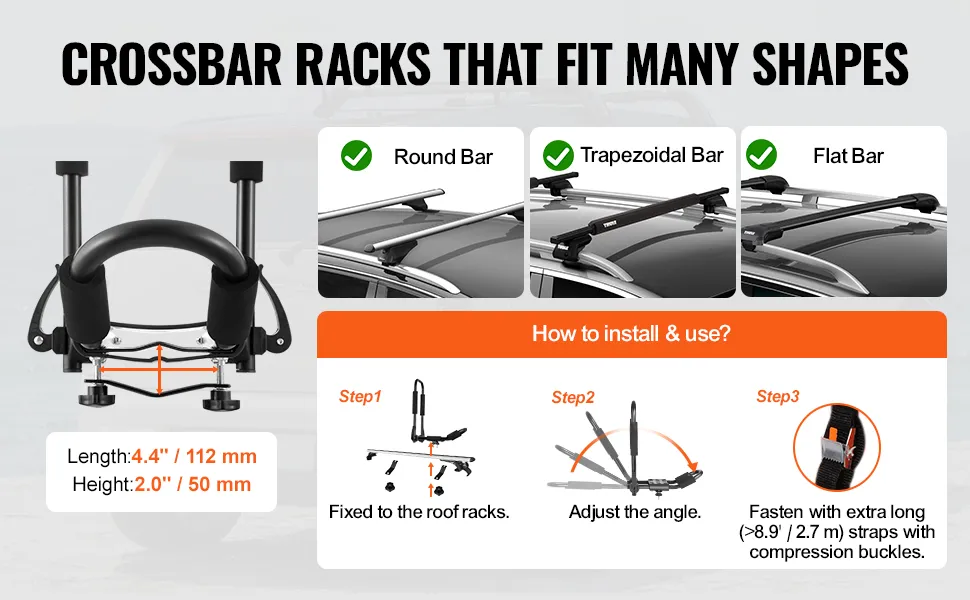
Credit: www.vevor.com
Safety Checks Before Travel
Before hitting the road with your newly installed kayak carrier, it’s crucial to ensure everything is securely in place. The last thing you want is your kayak coming loose while driving, potentially causing damage or accidents. Conducting thorough safety checks can make all the difference between a smooth trip and an unexpected mishap. Let’s dive into the essential checks you should perform to guarantee a safe journey.
Inspecting The Installation
Take a moment to review every component of your kayak carrier installation. Ensure all bolts and straps are tightly secured. Look for any signs of wear and tear or rust that might compromise the integrity of the carrier. A quick inspection can prevent major issues later.
If you have a roof rack system, verify that the crossbars and towers are properly fitted. You might be surprised how a small oversight can lead to big problems. Pay special attention to the connection points—these are critical areas that should be flawless.
Testing Stability
Once your kayak is mounted, gently shake it to test its stability. Does it wobble or shift? If it does, it’s time to tighten everything up. A stable kayak means peace of mind during your travels.
Consider doing a short test drive around your neighborhood. Listen for unusual sounds or vibrations. These could be signs that something isn’t quite right. Would you trust a loose kayak on a highway at high speed?
Finally, ask yourself: is this carrier ready for the road? Trust your instincts and make adjustments if anything feels off. Your journey should be stress-free, and it all starts with ensuring your kayak is securely fastened.
Maintenance Tips
Installing a kayak carrier requires careful alignment and secure fastening on your vehicle’s roof rack. Ensure the carrier fits snugly and all straps are tightly fastened to prevent any movement during transport. Regularly check the stability and condition of the carrier to ensure safety on the road.
Maintaining your kayak carrier is crucial to ensure its longevity and performance. Just like you would regularly service your car, your kayak carrier requires attention to keep it in optimal condition. This not only extends the life of your equipment but also ensures your kayak is securely transported. Let’s dive into some practical maintenance tips that will keep your kayak carrier in tip-top shape.Regular Checks
Perform regular inspections to catch any issues early. Check the tightness of bolts and screws, especially after long trips. Loose fittings can compromise safety, so it’s worth the extra few minutes to check them. Inspect the straps and buckles for wear and tear. If you notice fraying or damage, replace them promptly. A damaged strap can snap, risking your kayak’s security.Cleaning And Care
Cleaning your kayak carrier after each use can prevent dirt buildup, which can lead to corrosion over time. Use a mild soap and water solution to wipe down the metal parts, and rinse thoroughly. Don’t forget the rubber pads that cradle your kayak. These can accumulate grime and lose grip if not cleaned regularly. A clean carrier not only looks better but functions better too. Have you ever thought about how weather conditions affect your carrier? UV rays can weaken materials, so consider applying a protective wax or spray to metal parts. This simple step can make a significant difference in durability. By staying proactive with these maintenance tips, you’re not just preserving your kayak carrier but also ensuring every adventure is a safe one.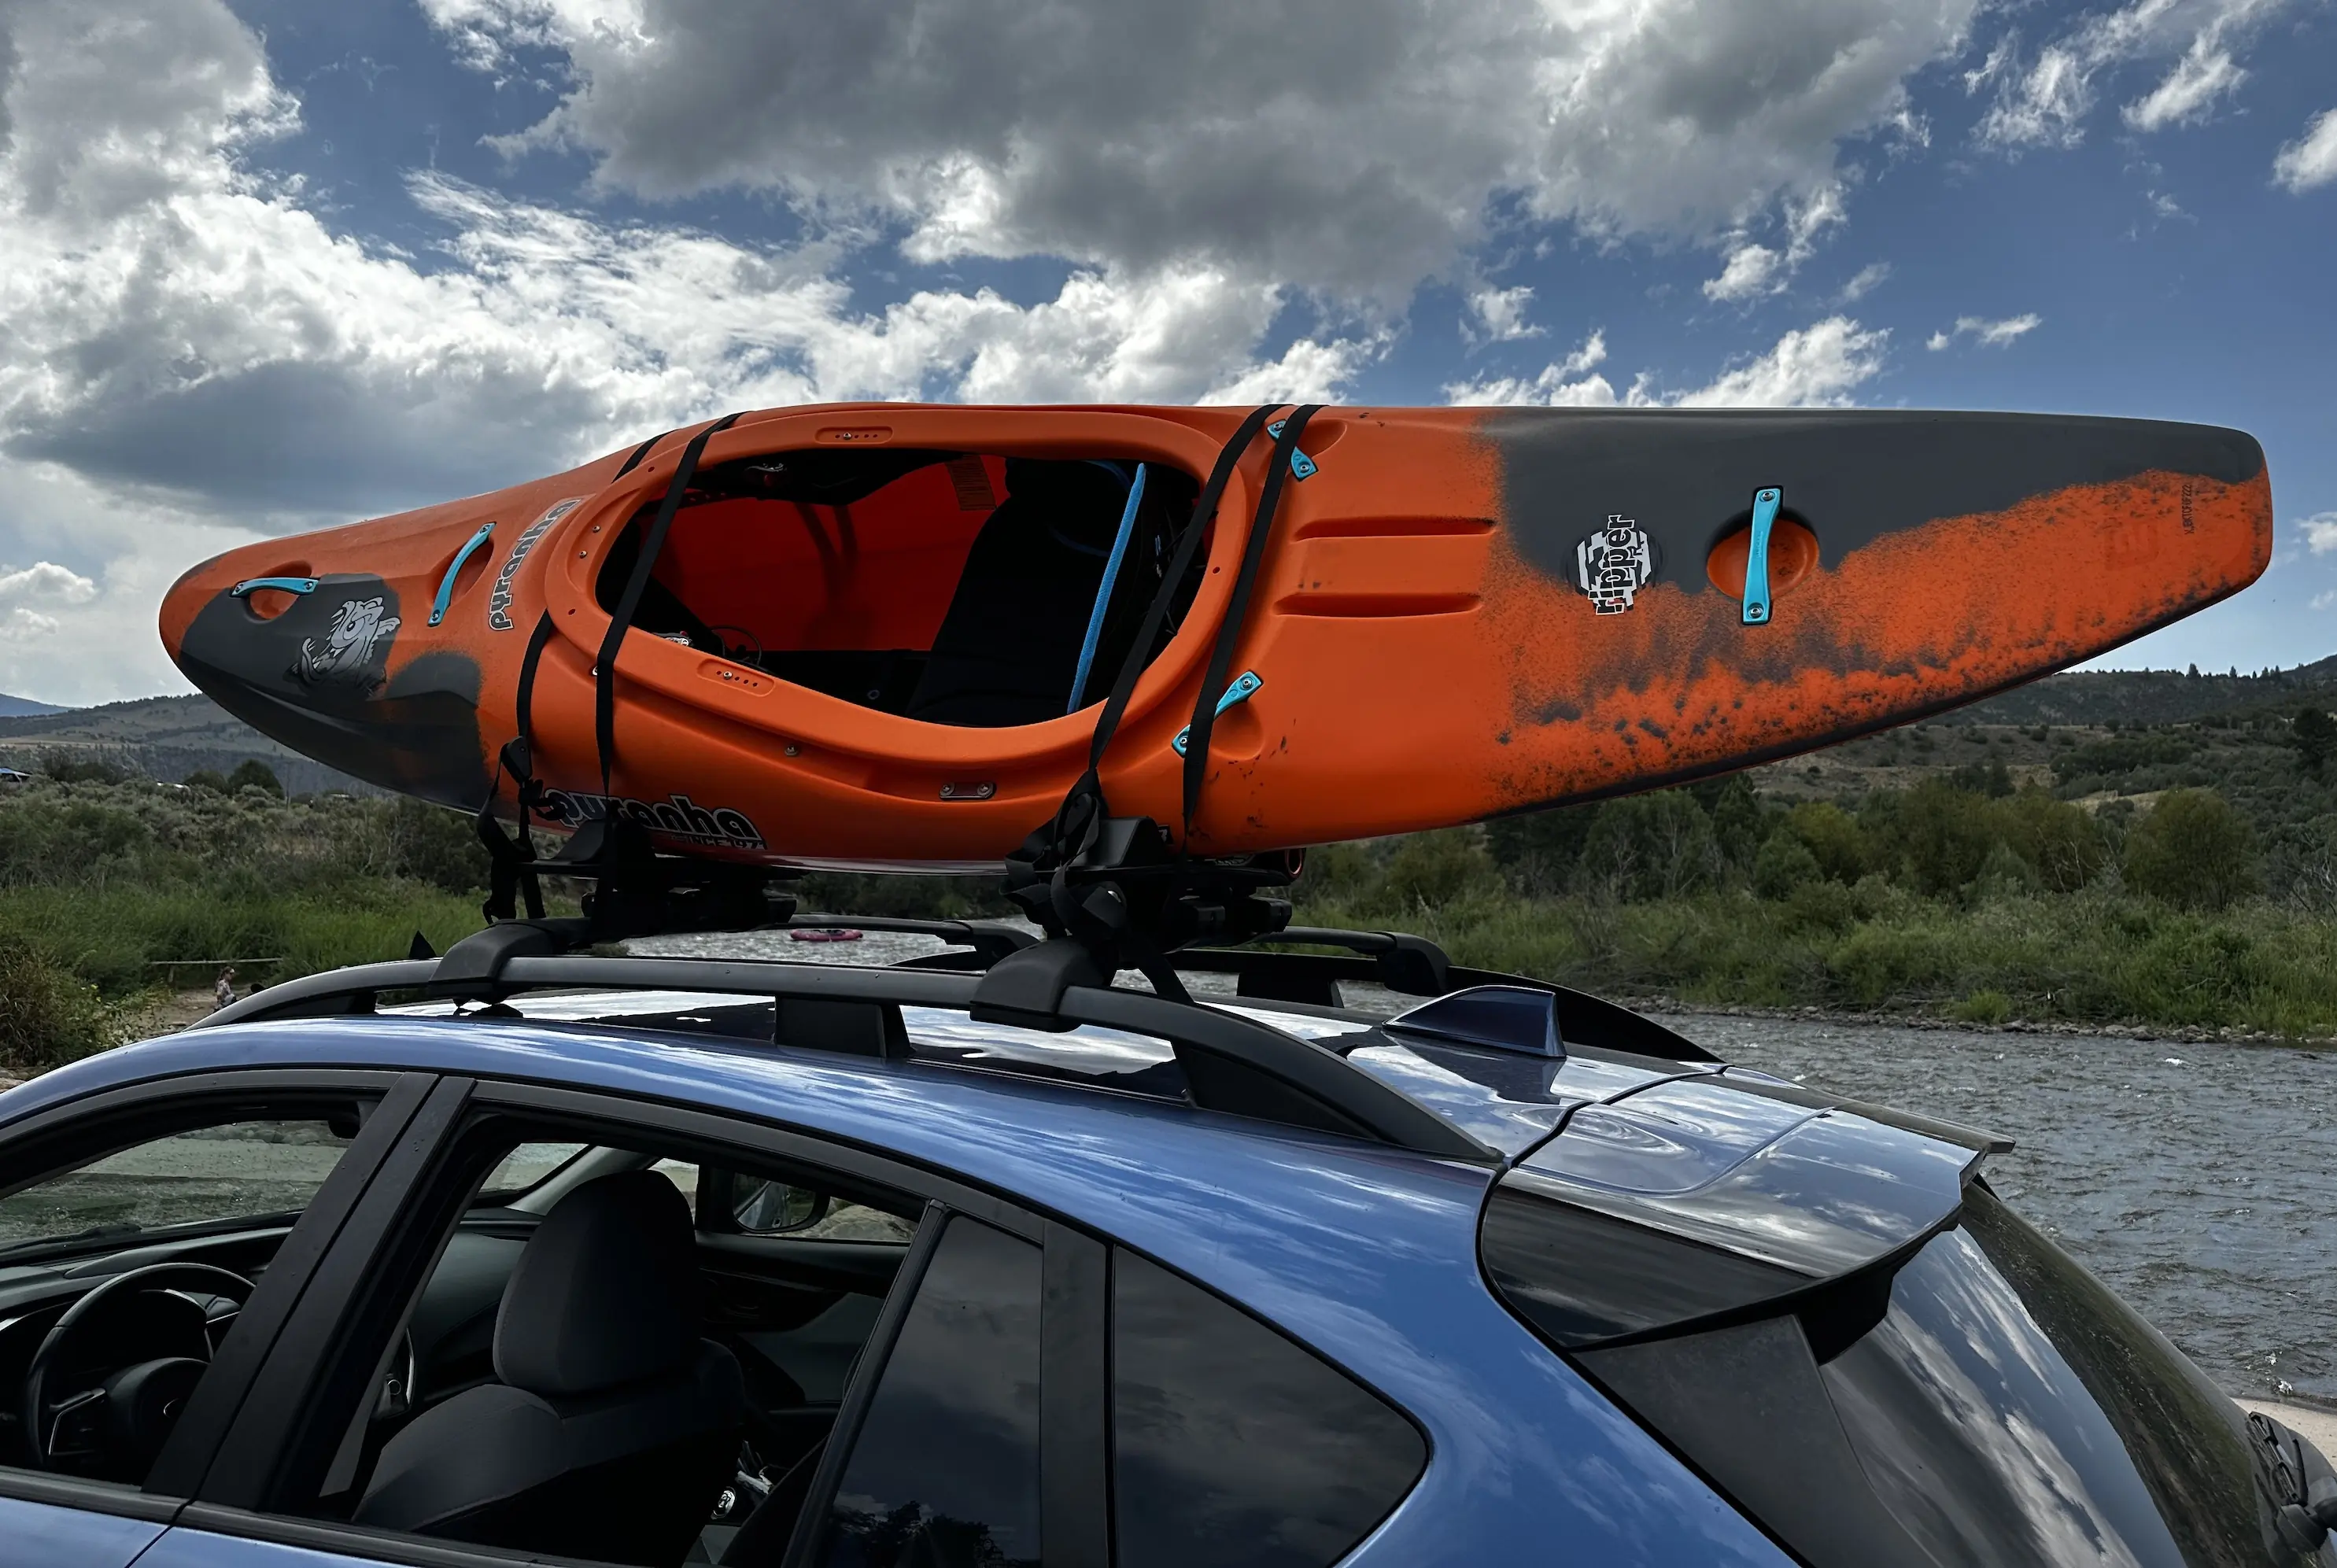
Credit: gearjunkie.com
Frequently Asked Questions
How To Use A Kayak Carrier Kit?
Secure the kayak on the carrier using straps. Position it evenly on the vehicle roof. Tighten the straps to prevent movement. Double-check all connections before driving. Ensure the kayak is balanced and won’t obstruct visibility.
How To Properly Strap A Kayak To A Roof Rack?
Position the kayak on the roof rack. Secure the kayak with cam straps over the hull. Tighten the straps to ensure stability. Ensure the kayak doesn’t move by shaking it gently. Use bow and stern lines for extra security.
Do I Need A Kayak Carrier?
Transporting a kayak safely often requires a carrier. It prevents damage to the kayak and your vehicle. A kayak carrier ensures secure and easy transportation, especially for long trips. Without it, you risk mishaps or damage. It is an essential accessory for kayaking enthusiasts.
How To Transport A Kayak Without Crossbars?
Use foam blocks or pool noodles for support. Secure the kayak with ratchet straps through car doors. Avoid high speeds. Check local laws for rooftop transport.
Conclusion
Installing a kayak carrier is easier than you think. Follow the steps carefully. Ensure all parts are secure and tight. Always check your vehicle’s roof weight capacity. Safety first! Double-check the straps before driving. This prevents accidents. Practice makes perfect.
Try installing the carrier a few times. It builds confidence. Soon, you’ll be ready for your kayaking adventure. Enjoy the convenience of transporting your kayak safely. Happy paddling!