
Ever find yourself tripping over your kayak in the garage or backyard? You’re not alone.
Whether you’re a weekend warrior or a seasoned paddler, storing your kayak can be a headache. But what if you could turn that chaos into calm with a simple DIY project? Imagine having a neat, organized space where your kayak is safely stored and easily accessible.
Intrigued? You should be. In this guide, you’ll discover how to make a kayak rack that not only saves space but also protects your investment. Get ready to transform your storage woes into wins with step-by-step instructions that even a novice can follow. Stick around, because by the end, you’ll wonder why you didn’t do this sooner.
Materials Needed
Gather wooden boards, screws, and brackets for building a sturdy kayak rack. Include a measuring tape and saw for precise cuts. Sandpaper and paint ensure a smooth, weather-resistant finish.
Creating your own kayak rack is a fantastic DIY project that ensures your kayak is stored safely and efficiently. To start this project, you’ll need to gather the right materials. Having the right materials on hand not only makes the building process smoother but also ensures the durability and functionality of your kayak rack. Let’s dive into what you’ll need to get started.Wood
Wood is the backbone of your kayak rack. Choose sturdy options like pressure-treated lumber, cedar, or redwood. These woods are resistant to rot and weather, making them perfect for outdoor use.
Metal Brackets
Metal brackets are essential for providing additional support. They help in securing the joints and ensuring the rack’s stability. Opt for galvanized steel brackets to prevent rusting.
Screws And Bolts
You’ll need a variety of screws and bolts to hold everything together. Ensure you have both wood screws for the wooden parts and machine bolts for securing the metal brackets.
Paint Or Sealant
A good paint or sealant is crucial for protecting your wood from moisture and UV damage. Choose a weather-resistant sealant or an outdoor-grade paint to extend the life of your rack.
Measuring Tape
Precision is key when building a kayak rack. A reliable measuring tape will help you ensure that all parts fit perfectly together, preventing any wobbling or instability.
Saw
A saw is indispensable for cutting your wood to the desired lengths. Whether you prefer a handsaw or a power saw, make sure it’s sharp and ready to handle the job.
Drill
A drill will make the process of assembling your kayak rack much faster. It’s essential for drilling pilot holes and driving screws into the wood.
Sandpaper
To ensure a smooth finish, sandpaper is necessary. It helps in rounding off any sharp edges and preparing the wood for painting or sealing.
Once you have gathered all these materials, you’re well on your way to constructing a sturdy and reliable kayak rack. Have you ever built something similar before? Using quality materials can make a significant difference in the outcome and longevity of your project.Choosing The Right Location
Choosing the right location for your kayak rack is a crucial step in ensuring its functionality and durability. The location you select can impact the ease of access, protection from weather elements, and even the overall aesthetic of your storage setup. Finding that perfect spot might seem daunting at first, but with a few considerations, you can make a choice that works best for you and your kayaks.
Accessibility Matters
Think about how often you use your kayak. If you’re an avid kayaker, placing your rack closer to the water can save you time and effort. Consider the distance from your home or garage to the water—shorter distances mean less hassle. Can you imagine the convenience of having your kayak ready to go at a moment’s notice?
Weather Protection
Weather can be a kayak’s worst enemy. Find a spot that offers some protection from the elements. A shaded area can help prevent sun damage, while a sheltered location can guard against rain and wind. You’ll want your kayak to stay in top condition, so choose wisely.
Space And Safety
Ensure there’s enough space for your rack without obstructing pathways or creating hazards. Check that the area is stable and level to prevent tipping or accidents. This is especially important if you have kids or pets running around. Safety should be a top priority.
Visual Appeal
While functionality is key, don’t forget about aesthetics. Select a location that complements your home and outdoor space. A well-placed rack can add to the charm rather than detract from it. Wouldn’t it be great to have a setup that not only works well but also looks good?
Community Regulations
Be mindful of any neighborhood or community regulations that might affect where you can place your rack. Check with local guidelines to avoid any issues. It’s always better to be safe than sorry, ensuring your choice aligns with community rules.
Design Considerations
Choosing materials carefully ensures durability for your kayak rack. Consider the weight and size for stability. Proper spacing between holders prevents damage and allows easy access.
Designing a kayak rack involves various considerations to ensure functionality and safety. A well-thought-out design protects your kayak and optimizes storage space. Here are some key aspects to keep in mind.Rack Types
Different rack types cater to various needs. Wall-mounted racks save floor space and are ideal for garages. Freestanding racks offer flexibility and can be moved as needed. Ceiling racks utilize overhead space, perfect for small areas. Choose a type that fits your space and usage.Space Requirements
Measure your storage area accurately. Consider the length and width of your kayak. Ensure there’s enough clearance around the rack for easy access. Think about future storage needs if you plan to get more kayaks.Weight Capacity
Check the weight capacity of your chosen rack. It should support your kayak’s weight comfortably. Consider the combined weight if you store multiple kayaks. This ensures the rack remains stable and secure.Measuring And Cutting
Measuring and Cutting Ensure accurate measurements for your kayak rack to fit snugly. Use a saw to cut wood precisely to size.
Creating a kayak rack at home is a rewarding DIY project that ensures your kayaks are stored safely and efficiently. The measuring and cutting phase is crucial as it sets the foundation for a sturdy and reliable rack. Getting accurate measurements and precise cuts will save you both time and effort in the long run. Dive into this part with a meticulous approach, and you’ll be well on your way to crafting a kayak rack that stands the test of time.Tools Required
Before diving into measurements, gather the essential tools for the job. A tape measure is indispensable for accurate dimensions. A saw, whether it’s a hand saw or power saw, is essential for cutting the materials to size. Ensure you also have a pencil for marking, a square for right angles, and a level for balance. These tools streamline the process and ensure precision.Safety Precautions
Safety should never be an afterthought, especially when handling sharp tools. Wear safety goggles to protect your eyes from flying debris. Gloves are crucial to shield your hands from cuts and splinters. Always secure your materials with clamps to prevent movement while cutting. This not only guarantees a precise cut but also keeps your fingers away from the blade. Measuring and cutting might seem straightforward, but it’s easy to overlook small details. Have you double-checked your measurements? An inch here or there can make a big difference in the stability of your rack. Taking the time now to ensure everything is spot-on will pay off when your kayak rack stands firm and functional.Building The Base
Creating a kayak rack begins with a sturdy base. Gather materials like wood or metal for durability. Ensure the base is level for stability, supporting multiple kayaks safely.
Building the base of your kayak rack is a critical step that lays the foundation for a sturdy and reliable structure. A well-constructed base ensures that your kayaks are supported safely and securely. As you embark on this part of your DIY project, consider the space available and the number of kayaks you need to store.Assembly Instructions
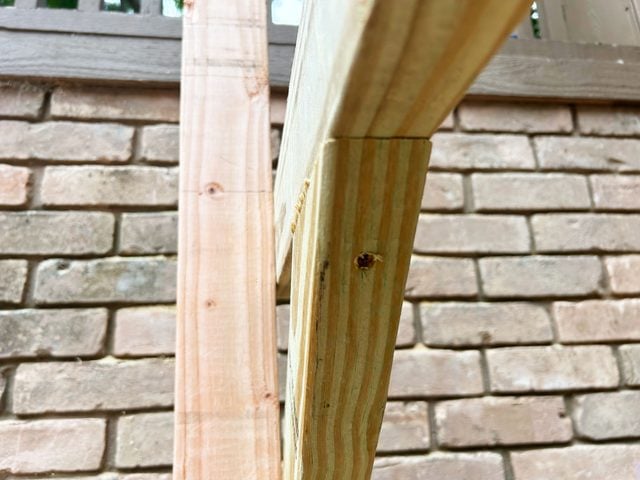
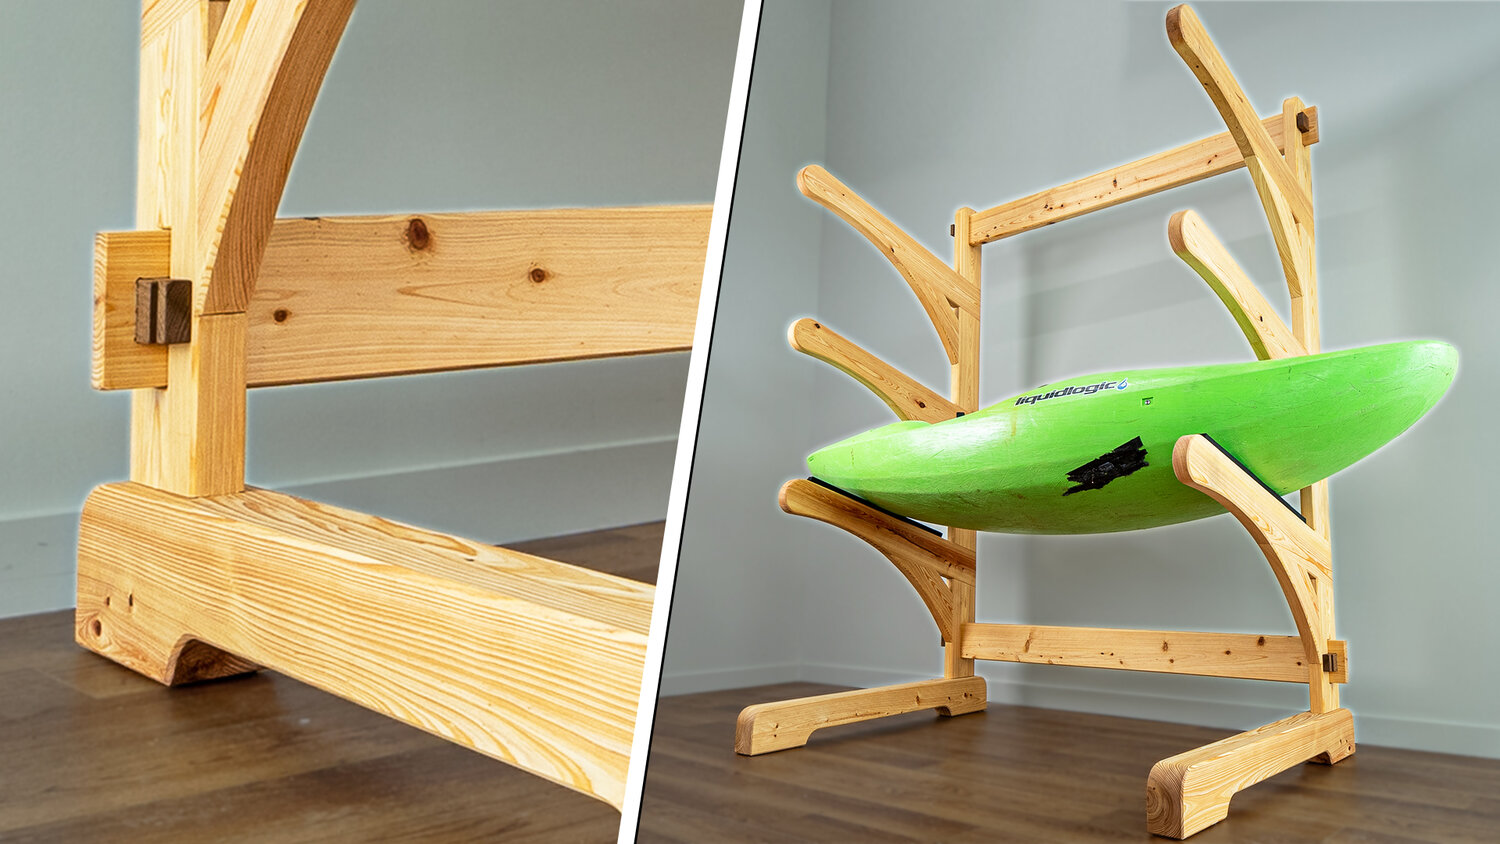
Start by gathering all necessary materials such as wooden beams, screws, and a drill. Choose treated lumber for durability, especially if the rack will be exposed to the elements. Cut the wooden beams according to your desired dimensions, ensuring they are long enough to support the kayaks. Lay the beams on the ground to form a rectangular base. Secure the corners with screws, ensuring each joint is tight to prevent wobbling. Double-check the measurements before finalizing the assembly. Consider adding cross-bracing for additional stability.Securing The Structure
Once the base is assembled, the next step is to secure it to the ground. This can prevent any accidental tipping when kayaks are loaded. If you’re installing the rack outdoors, consider anchoring it with concrete footings. Use metal brackets to attach the base securely to the ground. For indoor storage, ensure the base is level and place it on a non-slip surface. You might find that adding rubber pads to the feet of the rack provides additional grip. Think about the weight of your kayaks and ensure that the base can handle it without bending or buckling. Remember, a solid foundation is key to a long-lasting kayak rack. Are there any specific challenges you’re anticipating with securing the base?
Credit: www.theawesomeorange.com
Adding Support Arms
Support arms enhance stability for kayak racks, preventing unwanted movements. Securely attach arms to the main structure using bolts or screws. This ensures your kayak stays in place, ready for the next adventure.
Adding support arms is crucial for a sturdy kayak rack. They ensure the kayak stays safe and secure. Proper positioning and fastening techniques prevent accidents and protect your kayak. Follow these simple steps to make your kayak rack reliable.Positioning The Arms
Placing the support arms correctly is key. Start by measuring the kayak’s width. This helps you decide where to position the arms. Ensure the arms are evenly spaced. This provides balanced support. Keep the arms at a height that’s easy to access. Consider the kayak’s length for arm placement. Adjust the angle for maximum support.Fastening Techniques
Secure the arms using strong materials. Bolts and screws work well for fastening. Use a drill to make holes for the bolts. Tighten them firmly for stability. Check that the arms don’t wobble. Reinforce with brackets if needed. This adds extra strength. Ensure all fasteners are rust-resistant. This prevents damage over time. Test the arms by placing weight on them. Make adjustments if necessary.Finishing Touches
Finish your kayak rack with protective varnish to shield it from weather damage. Secure hooks and padding for stability and prevent scratches. Double-check the measurements to ensure the kayak fits snugly, reducing the risk of slipping or falling.
Finishing touches are what elevate your DIY kayak rack from a functional piece to an aesthetically pleasing and durable part of your outdoor setup. While the rack’s structure serves as the backbone, the finishing touches ensure it stands the test of time and weather, while also complementing your style. Whether you want to give it a splash of color or protect it against the elements, the final steps are crucial.Painting Or Staining
Adding a coat of paint or stain not only beautifies your kayak rack but also provides an extra layer of protection. Choose a color that matches your outdoor setting or one that makes your rack stand out. Remember, lighter shades may fade faster under the sun, while darker hues might absorb more heat. If you opt for staining, it enhances the natural wood grain, giving your rack an organic feel. Always use products specifically designed for outdoor use to ensure longevity.Weatherproofing
Weatherproofing is essential to shield your kayak rack from rain, snow, and sun damage. Consider using a sealant that offers UV protection to prevent fading and cracking. Applying a water-repellent finish is crucial if your rack is exposed to moisture frequently. This step is particularly important if you live in areas with harsh weather conditions. Think of it as providing your rack with a durable armor, ready to withstand whatever nature throws its way. Are you prepared to see your kayak rack endure seasons year after year?Installing The Rack
Installing the Rack Craft a sturdy kayak rack using wood or metal pipes. Securely mount it on a wall or ceiling for space-saving storage. Ensure the rack holds the kayak’s weight evenly to prevent damage.
Installing a kayak rack is essential for safe storage. It ensures your kayak is secure and protected. The installation process can be simple with the right steps. This guide will help you in setting up the rack effectively.Mounting Options
Consider the available space before choosing a mounting option. Wall-mounted racks save floor space. They are ideal for small garages. Ceiling-mounted racks are great for maximizing storage. These options keep your kayak off the ground. Freestanding racks are flexible. They are easy to relocate. Each option has its benefits. Choose what suits your space and needs.Testing Stability
After installing, check the rack’s stability. Ensure it holds the kayak securely. Shake the rack gently. It should remain firm. Look for any wobbling. Adjust the mounting if necessary. A stable rack prevents accidents. Regular checks maintain safety. Stability is key for long-term use.Maintenance Tips
Once you’ve constructed your kayak rack, maintaining it is crucial to ensure its longevity and effectiveness. Regular upkeep not only prevents damage but also saves you money in the long run. Here are some vital maintenance tips to keep your kayak rack in top shape.
Regular Inspections
Set a schedule for inspecting your kayak rack. A quick check every month can prevent potential issues from escalating. Look for signs of wear and tear, particularly on joints and fastenings.
Are the screws still tight? Loose screws can compromise the stability of the rack. Ensure that all parts are securely fastened to avoid any surprises.
Also, examine the materials. If your rack is wooden, check for rot or warping. For metal racks, keep an eye out for rust. Regular inspections can catch these issues before they become serious problems.
Repairing Damage
Don’t delay in addressing any damage you find during inspections. A small crack or loose bolt might seem insignificant, but it can lead to bigger issues if ignored. Immediate repairs can save you from costly replacements.
Consider keeping a basic repair kit handy. Include items like spare screws, sealants for cracks, and a rust remover. This way, you can tackle minor repairs right away.
Have you ever had a kayaking trip ruined by a faulty rack? Avoid such scenarios by addressing damage promptly. Think of repairs as an investment in many more stress-free adventures.
Credit: www.familyhandyman.com
Credit: craftedworkshop.com
Frequently Asked Questions
How To Transport A Kayak With No Roof Rack?
Use foam blocks or pool noodles to cushion the kayak on your car roof. Secure it with sturdy ratchet straps through the car windows. Ensure the kayak is centered and tightly fastened to prevent movement during transit. Check local regulations for transporting kayaks without a roof rack.
Is It Better To Store A Kayak Vertically Or Horizontally?
Storing a kayak horizontally is better. It helps distribute weight evenly, preventing warping. Use padded supports for stability.
How Wide Should A Kayak Rack Be?
A kayak rack should be at least 24 inches wide to securely hold most kayaks. Consider the width of your kayak and the vehicle’s roof size for best fit. Ensure the rack provides stability and support during transport to prevent damage or accidents.
Do It Yourself Kayak Rack For Car?
Create a DIY kayak rack using pool noodles, ratchet straps, and a foam block. Secure firmly to roof bars.
Conclusion
Building a kayak rack is simpler than you might think. With basic tools and materials, you can create a sturdy storage solution. This not only protects your kayak but also saves space. Follow the steps carefully to ensure a solid structure.
Double-check your measurements to avoid mistakes. Once complete, enjoy the convenience and safety it offers. Remember, a well-organized space makes your adventures more enjoyable. Happy kayaking!