
Imagine having the power to create your very own whey protein at home, tailored perfectly to your taste and nutritional needs. How exciting would that be?
No more spending a fortune on store-bought options with mysterious additives. You can take control of what goes into your body and craft the perfect protein blend right in your kitchen. Are you ready to unlock the secrets of homemade whey protein and transform your health and fitness routine?
This guide will show you how easy and rewarding it can be to make your own whey protein. Stick around, because you’re about to discover a simple process that could change the way you fuel your workouts and support your well-being.
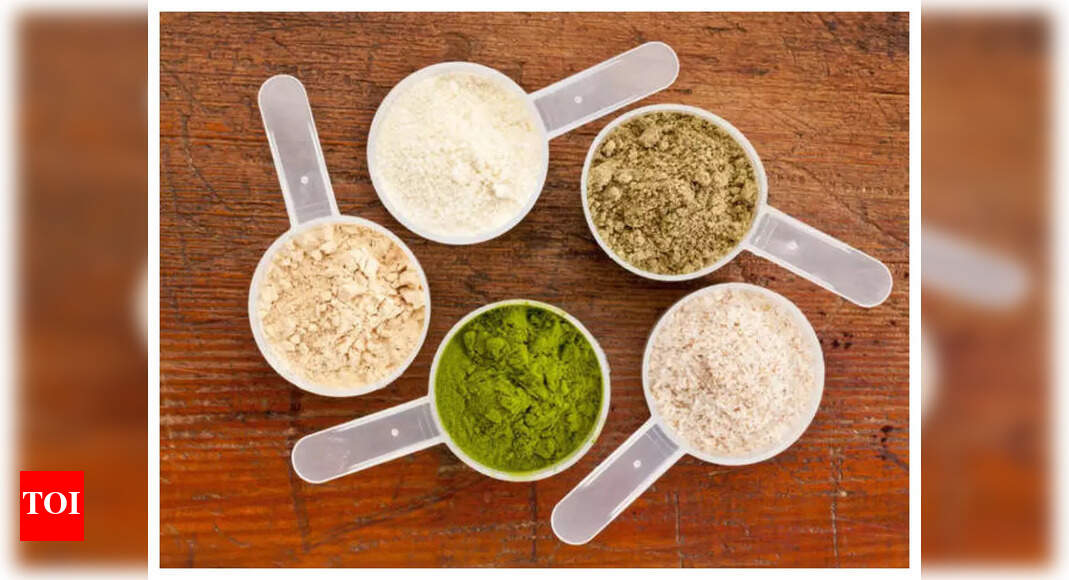
Credit: timesofindia.indiatimes.com
Benefits Of Homemade Whey Protein
Creating whey protein at home offers health benefits and cost savings. Control ingredients and avoid additives for a purer protein source.
Making whey protein at home offers a range of benefits that might surprise you. Not only does it give you control over the quality of ingredients, but it also ensures freshness and purity, free from any additives or preservatives. By preparing your own whey protein, you can tailor the flavor and texture to your liking, creating a personalized supplement that supports your fitness goals and dietary preferences.
Cost-effectiveness
Choosing homemade whey protein can be a smart financial move. Commercial protein powders can be expensive, often charging a premium for branding. Making it at home reduces costs significantly. You can buy raw ingredients in bulk, saving money while ensuring high-quality protein intake.
Customization And Personalization
Have you ever wished your protein shake tasted a bit different? With homemade whey protein, you have the freedom to customize flavors and ingredients. Add cocoa for a chocolatey twist or a touch of vanilla for a smoother taste. You control the sweetness and consistency—perfect for those with specific dietary needs or preferences.
Quality Assurance
Quality matters when it comes to what you put into your body. By making whey protein yourself, you guarantee that you’re using high-quality milk and avoiding unwanted additives. This transparency ensures that you are consuming pure, wholesome protein without any surprises.
Environmental Impact
Creating your own whey protein can also be kinder to the planet. Commercial protein powders come with packaging that contributes to waste. By making it at home, you can minimize packaging and reduce your carbon footprint, helping the environment while nourishing your body. As you explore the benefits of homemade whey protein, consider what matters most to you. Is it the cost savings, the personalized taste, or the assurance of quality ingredients? Each benefit offers a unique advantage, empowering you to make informed choices about your health and wellness journey.
Credit: www.tiktok.com
Ingredients Needed
Gather milk, lemon juice or vinegar, and a cheesecloth. These simple ingredients make homemade whey protein possible.
Preparing whey protein at home can be an enriching experience, especially if you’re someone who values knowing exactly what goes into your diet. The process begins with gathering the right ingredients. This ensures that you have a fresh, high-quality whey protein that can cater to your nutritional needs. But what exactly do you need to get started? Let’s dive into the essential ingredients that you will need.
Milk
Your primary ingredient is milk. Whole milk or raw milk is preferred for a richer whey protein, but you can opt for any type of milk that suits your dietary preferences. Skim milk works if you’re aiming for a low-fat version. It’s all about personal choice and dietary goals.
Lemon Juice Or Vinegar
To separate the whey from the curds, you’ll need an acid like lemon juice or vinegar. Freshly squeezed lemon juice is often favored for its natural flavor. However, vinegar is a viable alternative if you find yourself out of lemons. The acidity helps in curdling the milk, which is a crucial step in the process.
Cheesecloth Or Fine Mesh Strainer
A cheesecloth or a fine mesh strainer is essential for straining the curds from the liquid whey. A muslin cloth can also work if you don’t have a cheesecloth at hand. You want something that allows the liquid to pass through while holding back the solid curds.
Salt (optional)
Adding a pinch of salt can enhance the flavor of the whey protein. This step is completely optional and depends on your taste preference. Some prefer their whey protein completely unsalted, while others might enjoy a slight savory hint.
Flavors Or Additives (optional)
Once you have the basic whey, you might want to add some flavors or natural sweeteners. Think vanilla extract, cocoa powder, or even a hint of honey. These additions can make your homemade whey protein more palatable and enjoyable. By gathering these ingredients, you’re setting the stage for creating a fresh, personalized whey protein that suits your taste and nutritional needs. What unique twist will you bring to your homemade whey protein?
Equipment Required
Blender, fine mesh strainer, and a large bowl are essential for preparing whey protein at home. Cheesecloth or a clean kitchen towel helps strain the liquid. Use a spoon to stir and separate solids from whey.
Preparing whey protein at home is a simple process. It requires some basic kitchen equipment. This ensures you achieve the best results and maintain hygiene. Using the right tools makes the process smooth and efficient. Here’s a list of essential equipment you’ll need.
Stainless Steel Pot
A stainless steel pot is durable and non-reactive. It helps in heating milk evenly. Choose a pot with a heavy bottom to prevent burning.
Thermometer
A thermometer is important for monitoring temperature. It ensures milk reaches the required heat. This step is crucial for proper whey separation.
Cheesecloth
Cheesecloth is used to strain the whey. It separates the liquid from the solid curds. Make sure it’s clean and food-grade.
Colander
A colander supports the cheesecloth while straining. It allows the whey to drain smoothly. Choose one that fits well over your bowl.
Large Bowl
A large bowl collects the whey. Ensure it is big enough to hold the liquid. It should be clean and free from any residue.
Ladle
A ladle helps in scooping out the curds. It aids in transferring them to the cheesecloth. Use a ladle with a long handle for convenience.
Mixing Spoon
A mixing spoon stirs the milk while heating. It helps in even distribution of heat. Opt for a wooden or silicone spoon to avoid scratching the pot.
Measuring Cups
Measuring cups are essential for accuracy. They help in measuring milk and other ingredients. Use standard measuring cups for consistency. With these tools, you can create whey protein at home easily.
Step-by-step Process
Begin by boiling milk to separate curds from whey. Strain the mixture using a cheesecloth to collect whey. Store the liquid whey in a clean container, and refrigerate for later use.
Preparing whey protein at home can be a rewarding and cost-effective venture. By following a simple process, you can ensure a fresh, natural protein source that complements your fitness goals. Let’s dive into the step-by-step process to create homemade whey protein.
Preparing Milk
Start by selecting fresh whole milk. Aim for organic if possible, as it ensures fewer additives and better quality. Heat the milk gently in a large pot until it reaches a simmer, but avoid boiling it.
Curdling The Milk
Once the milk simmers, it’s time to curdle it. Add an acidic agent like lemon juice or vinegar. Stir gently and watch as curds begin to form, separating from the liquid whey. This process typically takes a few minutes.
Straining The Whey
Place a cheesecloth over a large bowl or pot. Carefully pour the curdled milk into the cheesecloth. Allow the whey to drain through, leaving the curds behind. You might be surprised at how much liquid is extracted during this process.
Drying The Whey
The liquid whey you’ve collected needs to be dried. Pour it into a large, shallow pan and let it evaporate naturally in a warm, dry place. Alternatively, use a dehydrator for quicker results. Once the liquid has evaporated, you’re left with a fine powdery whey protein. Creating your own whey protein at home can be an eye-opening experience. Have you ever considered how fresh ingredients can impact your health journey? Give this process a try and see the difference it makes in your nutritional regimen.
Storage Tips
Discover the art of making whey protein at home with simple steps. Combine milk and an acid like lemon juice. Strain the mixture and collect the whey. Store in an airtight container in the fridge.
Storing homemade whey protein properly is crucial to maintaining its freshness and effectiveness. You’ve gone through the effort of preparing it, so let’s ensure it stays in top condition. Whether you’ve made a large batch or a single serving, understanding the best practices for storage can make a significant difference.
Choose The Right Container
Use airtight containers to prevent moisture and air exposure. Glass jars with tight lids are excellent for storage. They keep the whey protein from absorbing any odors or contaminants.
Maintain Optimal Temperature
Store your whey protein in a cool, dry place. Avoid direct sunlight, which can degrade the quality. Your pantry or a kitchen cabinet is typically ideal.
Label With Date
Always label your containers with the preparation date. This helps you keep track of freshness and ensures you use it within a reasonable timeframe.
Consider Portion Sizes
Divide your whey protein into smaller portions if you plan to use it over time. This reduces the exposure to air every time you open the container, preserving its quality.
Avoid Freezing
Freezing can alter the texture and solubility of whey protein. Keep it refrigerated if you need to store it for an extended period but avoid the freezer. Storing homemade whey protein properly ensures you get the most out of your efforts. Have you ever experienced changes in taste or effectiveness when whey protein wasn’t stored well? Implementing these tips can help you avoid that and maintain quality.
Usage Ideas
Whey protein is versatile. It enhances many recipes and meals. Discover creative ways to incorporate it into your daily diet. Transform your nutrition with these simple ideas.
Smoothies And Shakes
Whey protein boosts smoothies and shakes. Add it to your favorite fruits and vegetables. Blend with milk or yogurt for a creamy texture. Try adding a scoop to a banana and spinach smoothie. This makes a refreshing, protein-packed drink.
Baking Recipes
Enhance your baked goods with whey protein. Mix it into pancake or waffle batter. Add it to muffin or bread recipes. Substitute some flour with whey protein for a nutritional boost. Your baked treats will be delicious and healthy.
Protein Bars
Create homemade protein bars with whey protein. Combine it with oats, nuts, and honey. Form into bars and refrigerate. These make a perfect snack for energy and nutrition. Customize with your favorite ingredients for variety.
Safety Considerations
Ensure clean utensils to prevent contamination. Choose quality milk and monitor temperatures carefully during preparation for safe consumption.
Preparing whey protein at home can be a rewarding experience, offering both health benefits and a sense of accomplishment. However, it’s crucial to prioritize safety to ensure that your homemade protein is both nutritious and safe to consume. Here are some key safety considerations to keep in mind as you embark on this culinary endeavor.
Use Fresh Ingredients
Always start with the freshest ingredients available. Fresh milk and yogurt not only ensure better taste but also reduce the risk of contamination. Check expiration dates and buy from trusted sources to guarantee quality.
Maintain Cleanliness
Cleanliness is paramount when making whey protein. Make sure all utensils and equipment are thoroughly washed and sanitized. This prevents the introduction of harmful bacteria that could spoil your protein.
Monitor Temperature
Temperature plays a crucial role in the whey protein-making process. Heating milk to the correct temperature is essential to separate the whey efficiently. Use a kitchen thermometer to avoid overheating, which can destroy nutrients.
Store Properly
Proper storage extends the shelf life of your whey protein. Use airtight containers and store them in a cool, dry place. This prevents moisture and bacteria from affecting your protein’s quality.
Check For Allergens
Be aware of potential allergens in your ingredients. If you or anyone consuming the protein has dairy allergies, consider alternative recipes or consult a health professional. It’s better to be safe than sorry.
Observe Hygiene Practices
Personal hygiene is just as important. Wash your hands thoroughly before handling any ingredients. This simple step can significantly reduce the risk of introducing contaminants. By considering these safety tips, you can enjoy the process of making whey protein at home without worry. What safety measures do you find most effective in your kitchen?
Credit: www.tiktok.com
Common Mistakes To Avoid
Choosing quality ingredients is crucial when preparing whey protein at home. Mixing too quickly can lead to clumps. Store the whey protein in an airtight container to preserve freshness and prevent spoilage.
Preparing whey protein at home can be a rewarding experience, offering a fresh and natural supplement for your fitness goals. However, many people make common mistakes that can affect the quality and effectiveness of the whey protein. Avoiding these pitfalls ensures you get the best out of your homemade whey protein without compromising on taste or nutritional value. Let’s delve into some of these common mistakes and learn how you can sidestep them.
Using Low-quality Milk
The quality of milk directly influences the protein content and overall taste of your whey. Opt for fresh, high-quality milk to ensure better results. Avoid using milk that’s close to its expiration date or has been stored improperly, as it may alter the whey’s flavor and texture.
Skipping The Curdling Process
Curdling is essential in separating whey from curds. Some might rush this step, resulting in incomplete separation and less whey yield. Ensure the milk is adequately heated and the acidic agent is properly mixed to facilitate the curdling process.
Not Straining Properly
Straining is crucial for removing the curds from the whey. Skipping thorough straining leaves unwanted residues in the whey. Use a fine mesh strainer or cheesecloth to ensure clear whey without any lumps.
Incorrect Storage Practices
Proper storage maintains the whey protein’s freshness and potency. Storing in inappropriate conditions can lead to spoilage. Place the whey in airtight containers and refrigerate promptly to preserve its quality.
Ignoring Hygiene During Preparation
Ensuring cleanliness during preparation is vital for safe consumption. Many overlook this, leading to potential contamination. Keep your utensils and work area clean and sterilized to prevent any health risks.
Overlooking Flavor Enhancement
Whey protein can be bland if not flavored correctly. Some forget to add natural flavors, making it less palatable. Experiment with natural flavorings like vanilla or fruit extracts to enhance the taste without adding artificial ingredients. Avoid these common mistakes, and you’ll be well on your way to creating a high-quality whey protein that not only meets your nutritional needs but also satisfies your taste buds. What are some unique ways you’ve tackled these challenges at home?
Frequently Asked Questions
Can You Prepare Whey Protein At Home?
Yes, you can make whey protein at home using milk and vinegar or lemon juice. Heat the milk, add vinegar, and let it curdle. Strain the curds to separate the whey. Store the liquid whey and use it in smoothies or baking.
Homemade whey protein is fresh and natural.
Is It Better To Mix Whey With Water Or Milk?
Mix whey with water for faster absorption and fewer calories. Use milk for added protein and creamier texture. Choose based on your nutritional goals and taste preference. Both options are effective for post-workout recovery.
How Do I Make My Own Protein Powder At Home?
Blend oats, almonds, and dried chickpeas into a fine powder. Add cocoa or vanilla for flavor. Store in an airtight container. Use as needed in smoothies or recipes. This homemade protein powder is natural and customizable.
What Do I Mix Whey Protein Powder With?
Mix whey protein with water, milk, almond milk, or smoothies for delicious taste and easy digestion. Customize your blend with fruits or oats for added nutrition. Adjust the liquid quantity for desired consistency. Always follow serving instructions on the packaging for optimal results.
Conclusion
Making whey protein at home is simple and rewarding. You save money and know exactly what goes into your supplement. Fresh ingredients mean better taste and health benefits. The process involves just a few steps and tools. Filter milk, separate curds, and you’re done.
Enjoy your homemade protein in shakes or recipes. It’s a practical choice for fitness enthusiasts and health-conscious individuals. Plus, it’s satisfying to create your own nutritional product. Try it today and enjoy the benefits of fresh, homemade whey protein. Your body will thank you.